ディスプレイの構成
| grandMA3 ユーザマニュアル » ワークスペース » ユーザインターフェース » ディスプレイの構成 | Version 2.2 |
ディスプレイは、ユーザ定義エリアと追加表示要素の組み合わせで構成されています。追加要素によって便利な機能に素早くアクセスできますが、それらの要素を利用できるかどうかは画面によって異なります。
以下の動画では、ディスプレイ構成の概要を説明しています。
Menu を押してから、任意の画面(画面8〜12は除く)で Configure Display をタップすると、その画面に対する Configure Display ポップアップが開きます。設定する画面番号は、ポップアップのタイトルバーに表示されます。このダイアログは、目的の画面でユーザ定義エリアをタップして Add Window ダイアログを開き、タイトルバーにある Configure をタップすることによっても開けます。
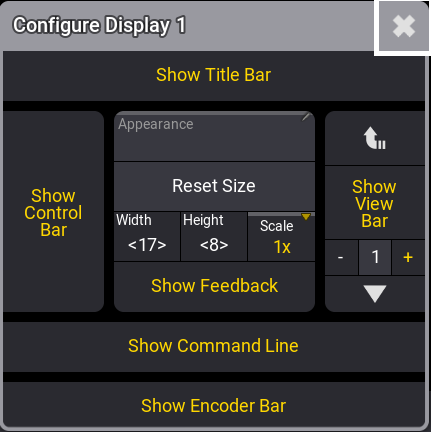
このポップアップには以下のようなエリアがあり、表示の設定/変更を行えます。
- Show Title Bar
これを有効にすると、grandMA3 onPC でウィンドウ枠が表示されます。このオプションはMAハードウェアにはありません。 - Show Control Bar
これを有効にすると、ディスプレイの左側にコントロールバーが表示されます。 - Appearance
これをタップすると Select Appearance ポップアップが開き、ディスプレイに対して既存のアピアランスを選択できます。アピアランスは、画面領域の背景として追加されます。詳しくは アピアランス を参照してください。 - Reset size
ユーザ定義エリアのサイズをリセットします。サイズは、Width および Height で変更できます。各ユーザが、ディスプレイにおけるユーザ定義エリアのサイズを設定できます。ディスプレイよりも大きいユーザ定義エリアの周りには、茶色の枠が表示されます。画面よりも小さいユーザ定義エリアでは、未使用領域がグレー表示されます。 - Scale
インターフェースのスケールを変更します。このオプションは onPC と外部画面でのみ利用できます。これは、高DPIやフルHDよりも解像度が低い画面で役立ちます。 - Show Feedback
ディスプレイ下部の 小さな Feedback オーバーレイの表示/非表示を切り替えます。これは、ショーが保存される際に短時間表示されます。 - Show View Bar
ディスプレイ右側のビューバー(ビューボタン列)の表示/非表示を切り替えます。 - Show Command Line
ディスプレイ下部にコマンドライン入力バーを表示します。 - Show Encoder Bar or Show Playback Bar
ディスプレイ下部のエンコーダバーまたはプレイバックバーの表示/非表示を切り替えます。 - タイトルバーの
 でポップアップが閉じます。
これらの追加要素は、利用可能なユーザ定義エリアの増やすために非表示にできます。また内部画面か外部モニタかにかかわらず、ほとんどの画面において、さまざまな組み合わせで表示できます。

画面1、2、3
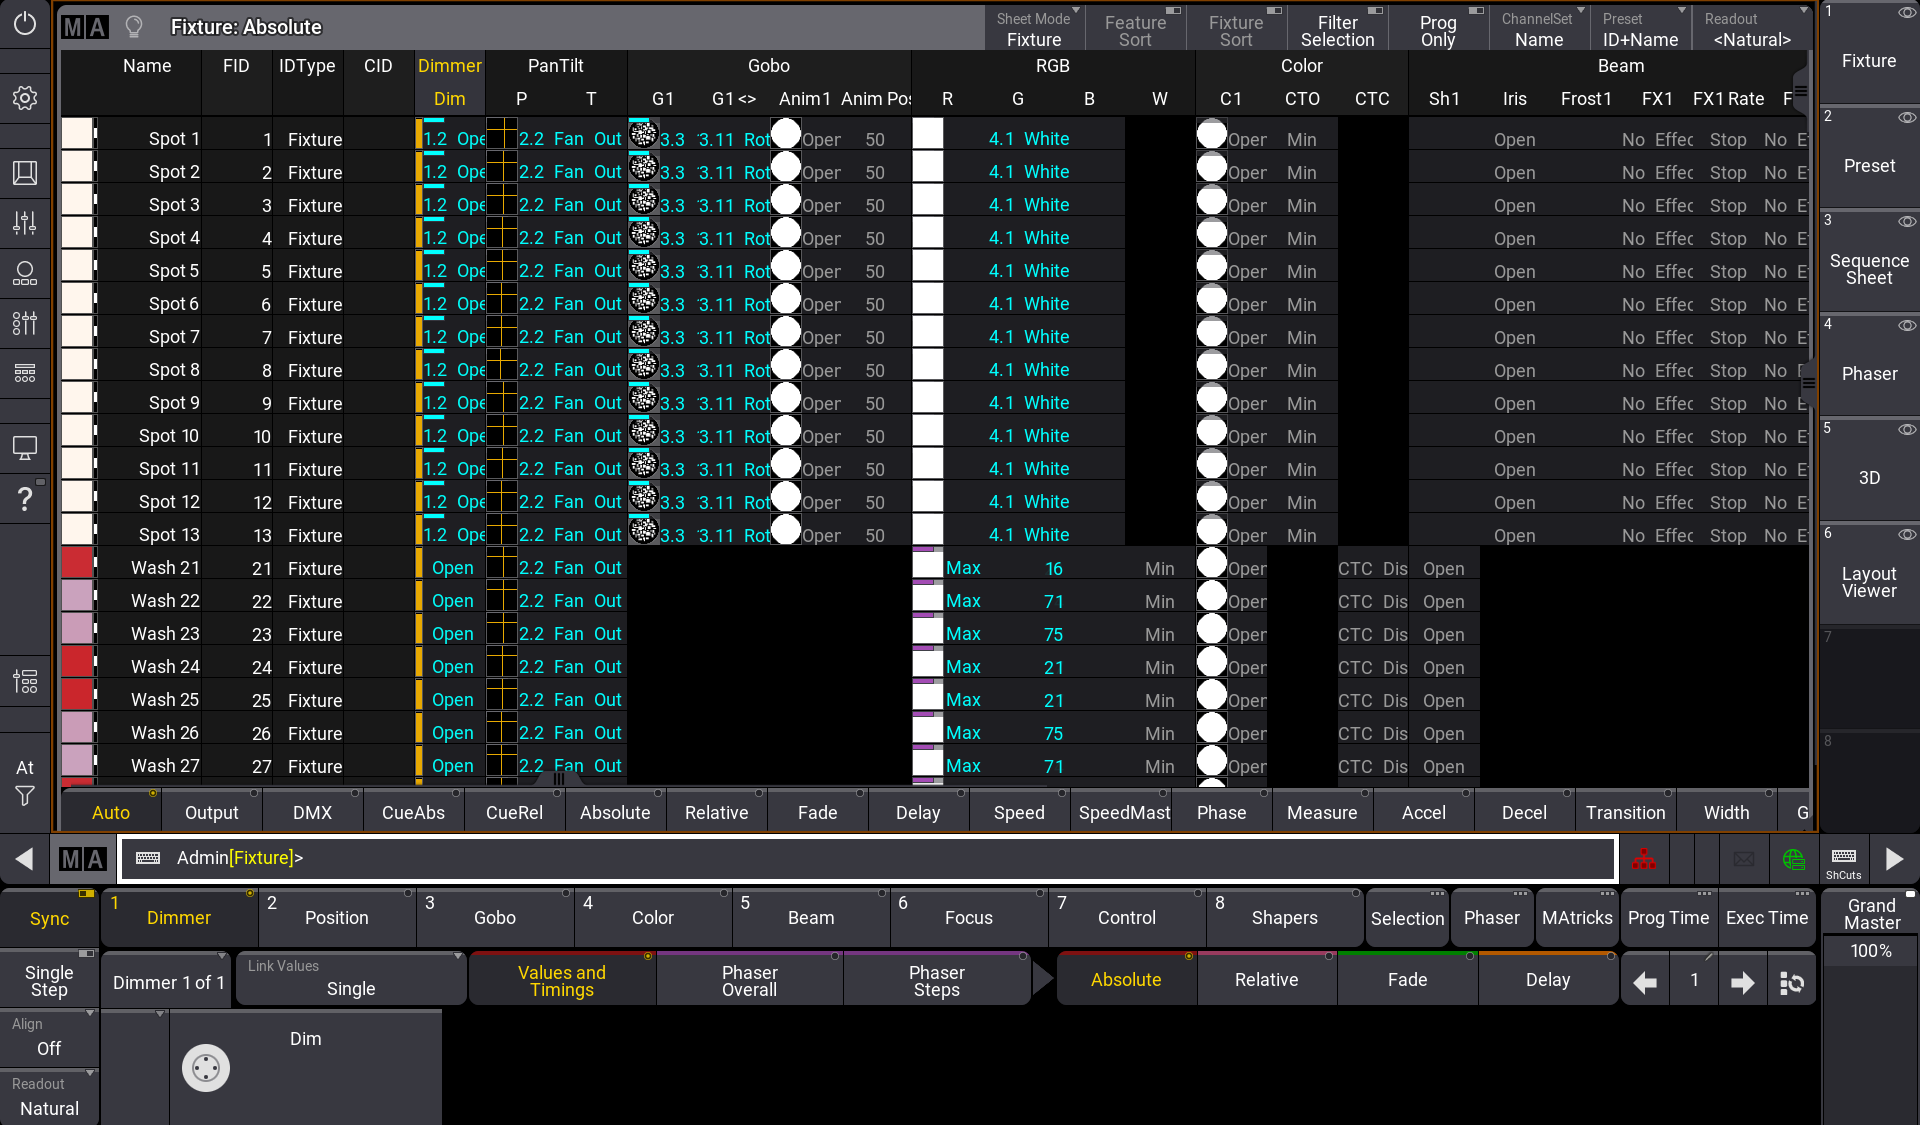
画面1、2、3は、卓上のメイン画面ワークスペースです。これらの画面では、内部画面の中で最も広いユーザ定義エリアを利用できます。これらは、選択した追加表示要素による構成が可能です。
画面1には、デフォルトでコマンドラインとビューバーが表示されます。また、コントロールバーやエンコーダバーを表示すこともできます。
画面2と3には、デフォルトでビューバーが表示されます。さらに grandMA3 compact XT では、画面2にコマンドラインが表示されます。コマンドライン、コントロールバー、および プレイバックバーを表示することもできます。
画面4、5
画面4と5は、オプションの外部モニタになります。これらの画面では、広いユーザ定義エリアを利用できます。これらは、選択した追加表示要素による構成が可能で、ビューバー、コマンドライン、コントロールバー、およびプレイバックバーを表示できます。
画面4と5では、解像度が異なるモニタを活用するために、Scale オプションが利用できます。
画面6、7
画面6は右コマンド画面、画面7は左コマンド画面です。これらの画面で利用できるユーザ定義エリアはわずかです。また追加表示要素を選んで構成できます。
画面6は、ビューバー、コマンドライン、およびコントロールバーを表示できます。
画面7は、ビューバー、コマンドライン、コントロールバー、およびプレイバックバーを表示できます。画面7で利用できるプレイバックバーには、Xキーに割り当てられているオブジェクトの状態が表示されます。
画面8、9、10、11、12
画面8、9、10、11、12 は、grandMA3 full-size、light、および extension で利用できるレターボックス画面です。これらの画面には、ユーザ定義エリアがありません。また画面の構成は変更できません。これらの画面は、特定の表示情報とユーザ入力に特化されています。
画面8には、エンコーダバーとグランドマスターが表示されます。
画面9には、プレイバックバーとマスター・セクションが表示されます。
画面10〜12には、プレイバックバーと、カスタム・セクションのエンコーダおよびホイールが表示されます。