画像
| grandMA3 ユーザマニュアル » 画像 | Version 2.4 |
インポートされた画像は、Image プールにあります。 詳しくは プール・ウィンドウ を参照してください。
|
|
重要 |
| Image プール全体のストレージ上限は最大100MB です。すべてのメディア・プールの合計サイズは300MBに制限されています。 |
Image プールは、できるだけ小さく保つことを推奨します。例えば、1画像あたりの最大サイズは64MB以下にしてください。また、画像の解像度は1920×1080を超えないようにしてください。
画像は、アピアランスとして利用できます。詳しくは アピアランスの作成 を参照してください。Gobos および Symbols プールにも画像をインポートできます。

以下のいずれかによって、Image プール・オブジェクトを編集します。
- Edit を押してから、目的のプール・オブジェクトをタップします。
- プール・オブジェクトの Swipey コマンドを開き、Edit を選びます。
Edit Images ポップアップが開きます。
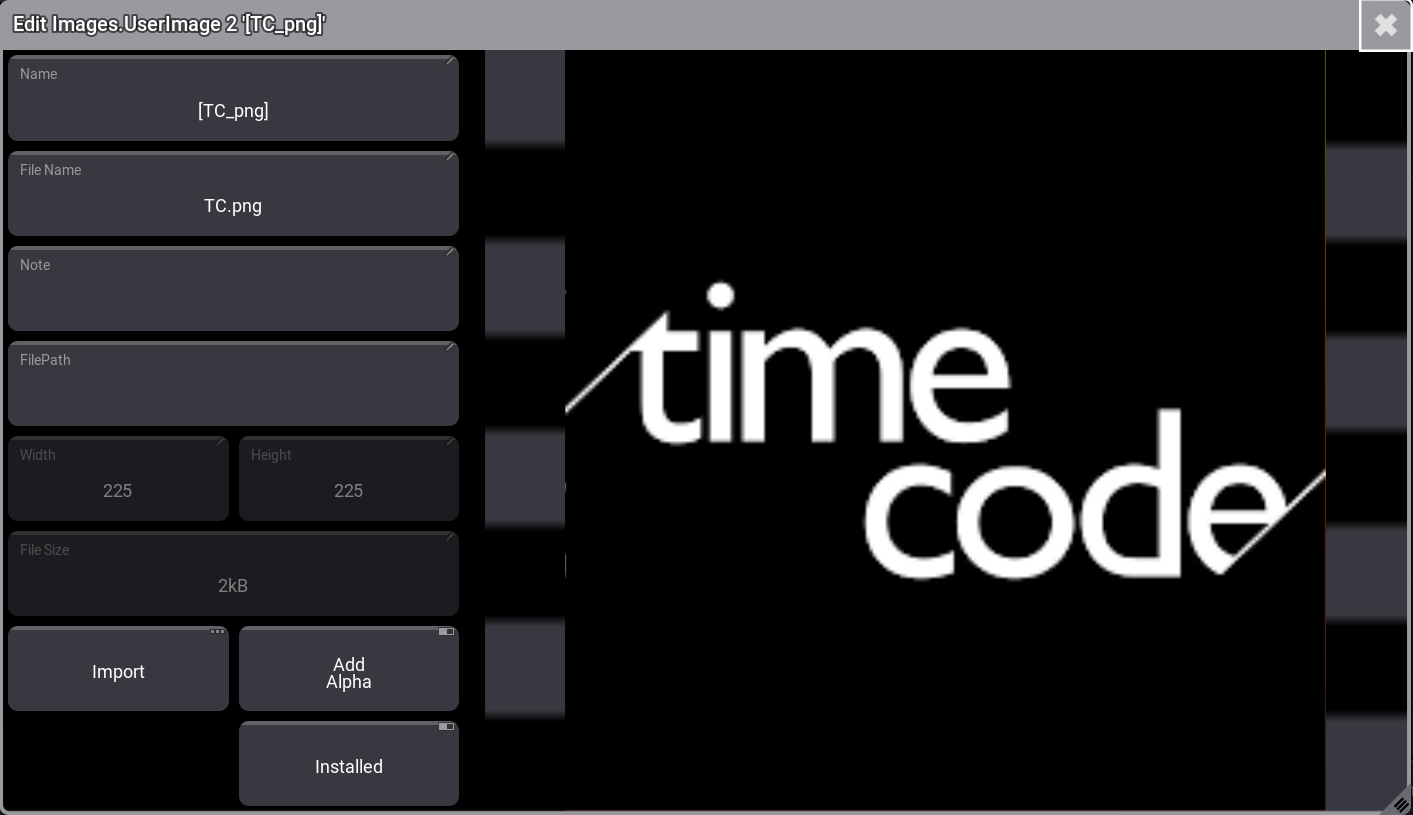 Edit Images ポップアップ
画像の黒い領域を透過させるには、Add Alpha をオンにします。これは、すでに透過チャンネルを持つ画像には機能しません。以下の例を参照してください。
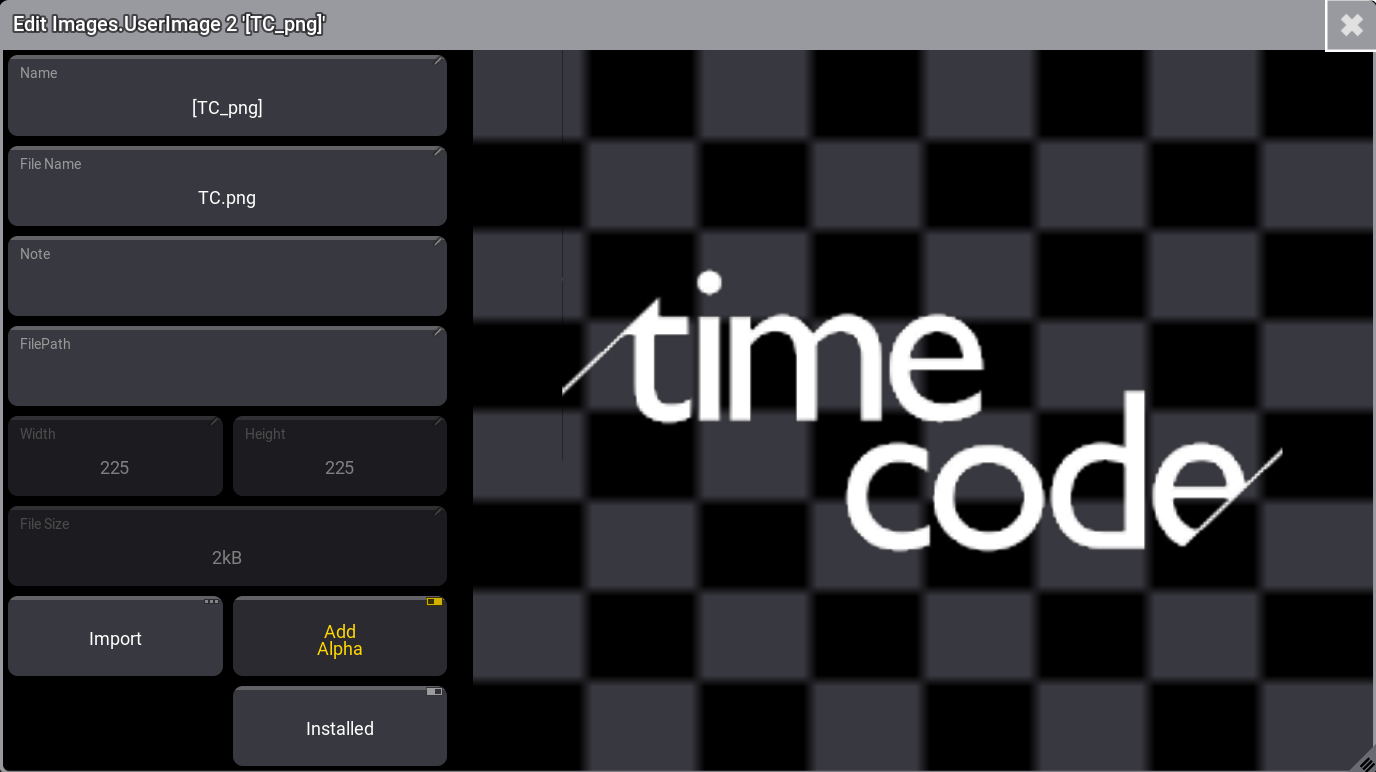
Installed を有効にすると、ファイルのインポート元として使用したファイル・アーカイブからファイルが更新されます。
Image プールによる画像のインポート
ワークフロー:
- 空のプール・オブジェクトを編集します。
- Import ボタンをタップします。
- 目的のソースにドライブを切り替えるには、タイトルバー右上の Internal をタップします。
- 目的の画像を選択します。
- Import をタップしてください。
- 新しい画像にラベルを付けます。
- Edit Image ポップアップを閉じます。
例を見るには、以下の動画をタップしてください。
デフォルトでは、grandMA3 ソフトウェアは画像のインポート/エクスポートに gma3_library/media/images フォルダを使用します。詳しくは フォルダ構造 を参照してください。
Import/Export メニューからの画像のインポート
ワークフロー:
- Menu を押します。
- Show Creator をタップします。
- ウィンドウ左上の Import をタップします。
- Images をタップします。
- ドライブを選択し、ウィンドウ右側にある空のプール・オブジェクトをタップします。
- インポートする画像を選択します。
- ウィンドウ下部の Import をタップしてください。
例を見るには、以下の動画をタップしてください。
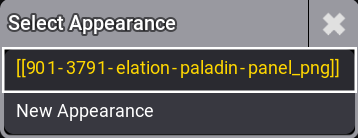
オブジェクトへの画像割り当て
画像はオブジェクトに直接割り当てることができます。
例えば、グループ46にイメージ3.5を割り当てるには、以下のように入力します。
|
|
User name[Fixture]>Assign Image 3.5 At Group 46 |
Select Appearance ポップアップが開きます。この画像をすでに使用している既存のアピアランスを選択するか、新しく作成してください。
プールからの画像削除
画像の削除は、他のプール・オブジェクトの場合と同様です。画像を削除すると、それが使われていた場所で表示されなくなります。
画像を削除するには、以下の3通りの一般的な方法があります。
コマンドラインによる画像削除
これに必要な基本キーワードは Delete と Image です。
Image プールには以下の3つがあります。
- Gobos
- Symbols
- Images
したがって、構文では Image プール番号を指定することが重要です。
[機能] Image ["イメージ名" または プール番号].["イメージ名" または イメージ番号]
例えば、イメージ4を削除したい場合は、以下のようになります。
|
|
User name[Fixture]>Delete Image 3.4 |
画像の範囲を削除するには、標準の範囲構文(Thru、+、-)を使用します。
シンボル5〜10を削除したい場合は、以下のようになります。
|
|
User name[Fixture]>Delete Image 2.5 Thru 10 |
GoboImage キーワードは、Gobo プールに保存されている画像の編集・削除に使用できます(GoboImage キーワード を参照)。
画面上の Image プールによる画像削除
必要条件:
画面に Image プールを表示。
- Delete を押します。
- プールの画像をタップしてください。
その画像が削除されます。
Swipey コマンドによる画像削除
必要条件:
画面に Image プールを表示。
- 削除したい画像を長押しします。
- 画面から指を離さずに、そのプール・オブジェクトをスワイプアウトします。
- Delete ボタンにスワイプして指を離してください。
画像が削除されます。