Align
| grandMA3 ユーザマニュアル » フィクスチャの操作 » Align | Version 2.2 |
Align 機能は、ソフトウェアのさまざまな場所に表示されます。また専用の Align キー や、Align キーワード があります。エンコーダバーでは、左側にある Align にアクセスできます。また、Align Bar をウィンドウとして作成することもできます。
Align は、アトリビュート値を2つ以上の値に分散させるために用いられます。5種類の Align モードと Off があります。詳しくは後述を参照してください。
Align を多用する場合、これは非常に便利なウィンドウです。種々のモードについては、前述および後述の説明を参照してください。
デフォルトでは、値の間隔が直線的(Linear)に遷移しますが、以下の Align Transition オプションによって、これを調整することもできます。
- Linear (デフォルト):
値を等間隔で分散させます。 - Sinus:
フィクスチャがサインカーブ状に配置されているかのように、値を分散させます。値そのものが、サインカーブ状になるわけではありません。Align モードに応じて、範囲の最初と最後では値の変化が小さく、範囲の中心に向かって変化が大きくなります。あるいは、その逆になります。 - Slow:
値の変化が、範囲の始めでは小さく、終わりに向かって大きくなります。 - Fast:
値の変化が、範囲の始めでは大きく、終わりに向かって小さくなります。
これらには、AlignTransition キーワード、Align キー、または Align Bar を用いてアクセスできます。
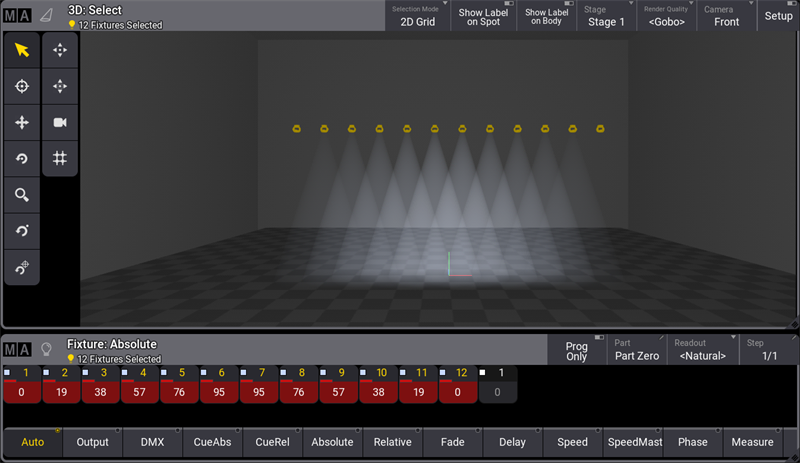
Align 機能は、種々のアトリビュートに対して使用できます。Dimmer、Position および Color が最も一般的です。以下の例では、Tilt や Dimmer アトリビュートに対して用いられています。
デフォルトでは Align モードが Off 、Transition が Linear になっています。そのため、エンコーダは選択されているすべてのフィクスチャを均等に調整します。
|
|
重要 |
| フィクスチャの選択順は重要です。アトリビュートは、選択順に従って比例的に調整されます。 |
Align モードは、新しいアトリビュートが調整されるまでアクティブになっています。
Align Bar
Align Bar ウィンドウでは、すべての Align 機能に素早くアクセスできます。ここには、Align モードと Align Transition の両方があります。
これは、他のウィンドウと同様に作成できます(Add Window ポップアップ - More タブ)。詳しくは ウィンドウの追加 を参照してください。


以下の例では、フィクスチャ1〜12が左から右の順でパッチされています。詳しくは ショーへのフィクスチャ追加 を参照してください。
Align /
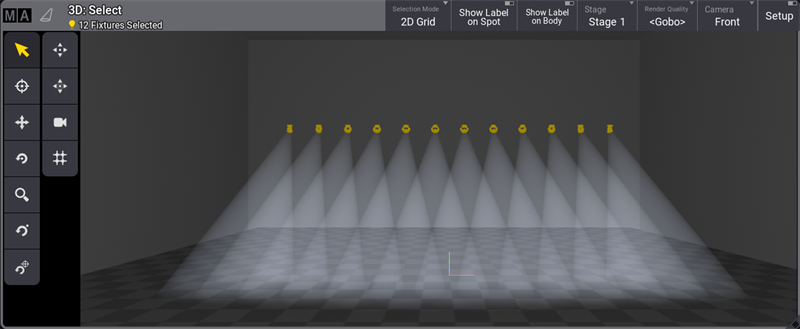
このモードは、フィクスチャを扇状に動かすのに最適です。直線的に扇状に動かすには、以下のようにします。
- フィクスチャ1〜12を選択します。
- Dimmer をフルにします。
- エンコーダを用いてフィクスチャを上に傾けます。
- エンコーダバーで Position をタップします。
- エンコーダバーの左側にある Align を長押しして Align ドロップダウン・メニューを開き、/ を選択します。
- Pan エンコーダを時計方向に回すとフィクスチャが扇状に開き、反対に回すと閉じます。
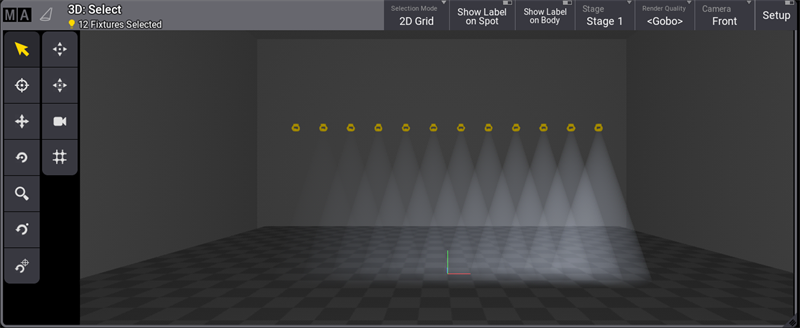
Align <
最初に選択されたフィクスチャから最後に選択されたフィクスチャに向かって値の変化が大きくなります。
- フィクスチャ1〜12を選択します。
- エンコーダバーで Dimmer をタップします。
- エンコーダバーの左側にある Align を長押しして Align ドロップダウン・メニューを開き、< を選択します。
- Dimmer エンコーダを時計方向に回します。
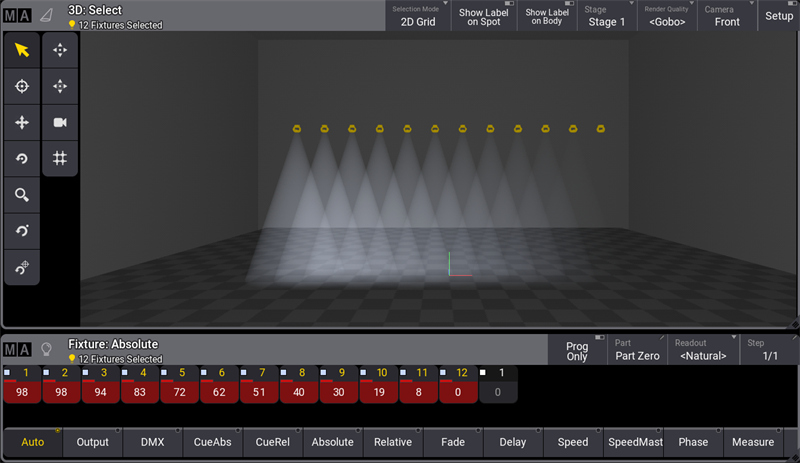
Align >
最後に選択されたフィクスチャから最初に選択されたフィクスチャに向かって値の変化が大きくなります。
- フィクスチャ1〜12を選択します。
- エンコーダバーで Dimmer をタップします。
- エンコーダバーの左側にある Align を長押しして Align ドロップダウン・メニューを開き、> を選択します。
- Dimmer エンコーダを時計方向に回します。
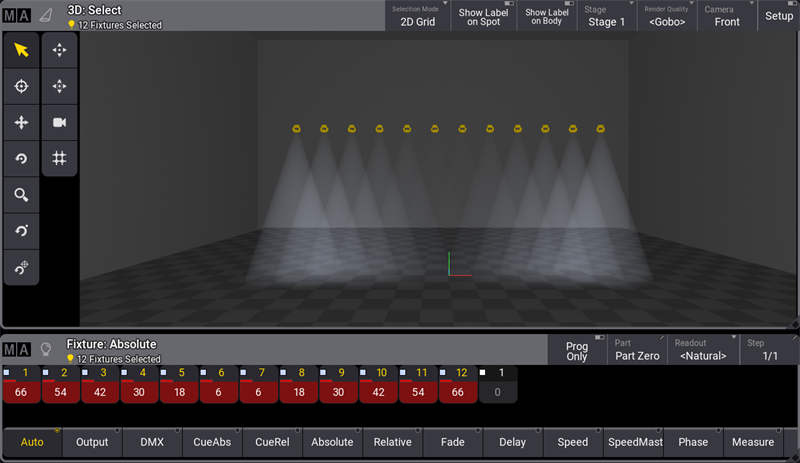
Align ><
この Align モードでは、セレクションの中央部から最初と最後に向かって値の変化が大きくなります。
- フィクスチャ1〜12を選択します。
- エンコーダバーで Dimmer をタップします。
- エンコーダバーの左側にある Align を長押しして Align ドロップダウン・メニューを開き、>< を選択します。
- Dimmer エンコーダを時計方向に回します。
Align <>
この Align モードで、セレクションの最初と最後から中央部に向かって値の変化が大きくなります。
- フィクスチャ1〜12を選択します。
- エンコーダバーで Dimmer をタップします。
- エンコーダバーの左側にある Align を長押しして Align ドロップダウン・メニューを開き、>< を選択します。
- Dimmer エンコーダを時計方向に回します。
XY Rotation
例えば Selection Grid では、アラインメントの Rotation 値を設定できます。詳しくは Selection Grid を参照してください。
角度を設定は以下のように行います。
- Align Bar の XY Rotation をタップすると、ポップアップが開きます。

Edit Alignment Rotation ポップアップ
値を変更するには、以下のいずれかを行ってください。
- ドラッグすると画面フェーダが動きます。
- AlignRotXY をクリックすると電卓が開きます。
- ドラッグすると矢印の方向が変わります。
|
|
ヒント |
| Rotation は、0°から360°まで5°単位で設定できます。 |
他の方法による Align
同じ Align 機能は、電卓 やコマンドラインによっても適用できます。
整列させたいアトリビュートに対応するエンコーダをタップして電卓を開くと、下の例のように Align 値を入力できます。
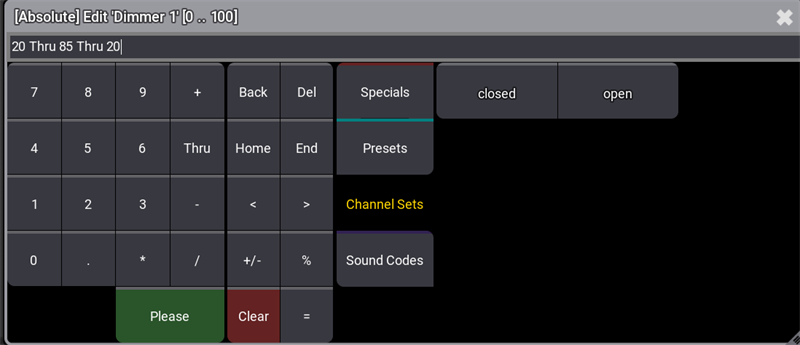
Align 機能は、コマンドラインからも適用できます。フィクスチャを選択し、以下の例のように Dimmer 値を設定してください。
|
|
User name[Fixture]>At 75 Thru 10 Thru 75 |