DCリモート
| grandMA3 ユーザマニュアル » リモート入出力 » DCリモート | Version 2.2 |
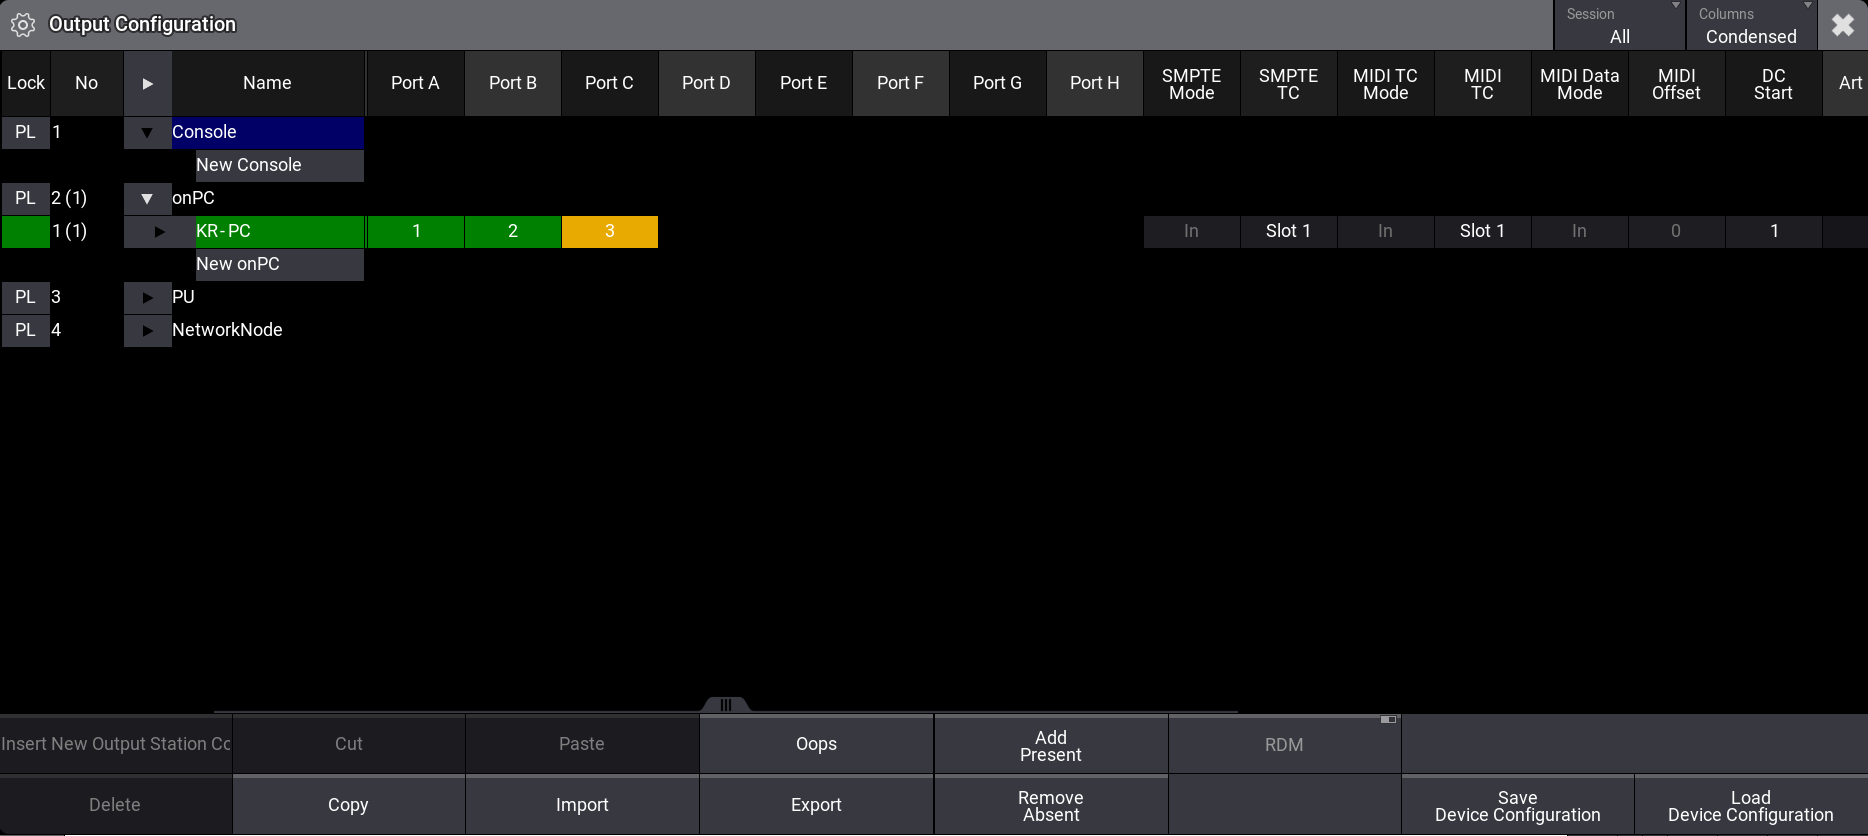
DC Remotes タブは、卓、command wing、または I/O Node の背面パネルにある DC Remote Control 入力を設定するために用いられます。
入力のハードウェア部分については、DCリモート入力の接続 を参照してください。
例
DC開始信号を設定するには、以下のようにします。
- Menu キーを押してメニューにアクセスし、Connector Configuration をタップします。Connector Configuration メニューが開きます。
― または ―
- コマンドラインからメニューを開きます。
| User name[Fixture]>Menu "ConnectorConfig" |
- DC Start を右クリックまたは長押しすると、DC Start Editor が開きます。
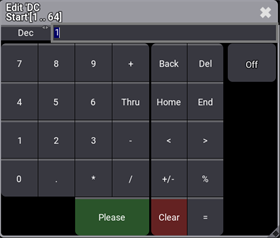
- DC Start 値を設定して、Please をタップしてください。開始信号が設定されます。
| ヒント | |
| In & Out メニューの Signal 値は、Connector Configuration の DC Start 値に対応しています。 |
| ヒント | |
|
DC Remotes の一般的な設定については、リモート入出力 を参照してください。