リモート入出力
| grandMA3 ユーザマニュアル » リモート入出力 | Version 2.2 |
リモート入出力は、In & Out メニューで操作します。In & Out メニューでは、例えばリモート・コントローラからコマンドを実行するためのパラメータを指定できます。
Menu を押して In & Out をタップすると、In & Out メニューが開きます。
メニューは、以下の6つのタブに分かれています。
DC Remotes、MIDI Remotes、DMX Remotes、OSC、PSN、および MVR です。
一般的な手順
DC Remotes、MIDI Remotes、および DMX Remotes の各タブには、共通するオプションがいくつかあります。これらについては以下で説明します。各リモート固有のオプションについては、対応するトピックを参照してください。
- Enabled: 対応する構成行の入力を有効にするには、Yes と No を切り替えます。
- Target: Assignment Editor でターゲットを設定します。
- Fader: フェーダを対応するターゲットに設定します。
- Key: 対応するターゲットにキーを設定します。
- Trigger On / Trigger Off: これらの値は、キー反応の範囲を指定します。例えば Trigger On を75%に設定した場合、入力信号がこの値を超えるとすぐにリモートが反応します。また、Trigger Off を25%に設定した場合、入力信号がこの値を下回るとすぐにリモート反応が停止します。
- In From / In To: これらの値は、指定されたフェーダに対する入力信号の反応範囲を定義します。
- Out From / Out To: これらの値は、入力信号の範囲を再計算して、出力信号の範囲と一致させます。フェーダの範囲は、出力信号の範囲によって決まります。例えばフェーダを100%まで上げたくない場合、Out To 値を90%に制限します。
- In / Out: テーブルの最後にあるこれらの列には、入力された信号値(In)と、選択したフェーダ機能の結果としての信号値(Out)が表示されます。
- Note: 対応する設定行の Note Editor を開きます。
リモートに対する Output Configuration Settings
Connector Configuration メニューには、DMX、タイムコード、リモートに関する複数のオプションがあります。リモートの Output Configuration オプションについては、こちらで説明します。その他の設定については、Connector Configuration を参照してください。
- MIDI Data Mode:
MIDIのモードを選択します。詳しくは MIDIリモート を参照してください。
- In: MIDIデータを受信します。
- Out: MIDIデータを送信します。
- In & Out & Thru: 受信したMIDIデータを出力および送信します。
- In & Out: MIDIデータを受信し、それを送信せずに別のMIDIデータを出力できます。
- MIDI Offset: MIDIインデックスを変更します。詳しくは MIDIリモート を参照してください。
- DC Start: DCリモートのトリガーを設定します。詳しくは DCリモート を参照してください。
- OSC Interface: これらの設定は、In & Out メニューの設定を反映しています。詳しくは インターフェースとIP を参照してください。
- PSN Interface: これらの設定は、In & Out メニューの設定を反映しています。
例
例1
DCリモートなどの新しい要素を追加するには、以下のようにします。
|
|
ヒント |
| 対応するハードウェアが適切に接続されていることを確認してください。詳しくは 最初のステップ を参照してください。 |
例の各ステップは、以下の動画やテキストに示されています。
- In & Out メニューを開きます。
- DC Remotes をタップします。
- Insert new DCRemote をタップすると、新しいDCリモート設定行が追加されます。
- リモート入力を有効にするには、Enable Input をタップします。ボタンが黄色に変わります。セッションやステーションの通信については、Station Control を参照してください。
- リモートの Signal を、例えば1に設定します。
- Target 列の対応する設定行を2本指でタップします。Assignment Editor が開きます。
- Target を選択します(例: ビュー)。選択すると、Editor が閉じます。
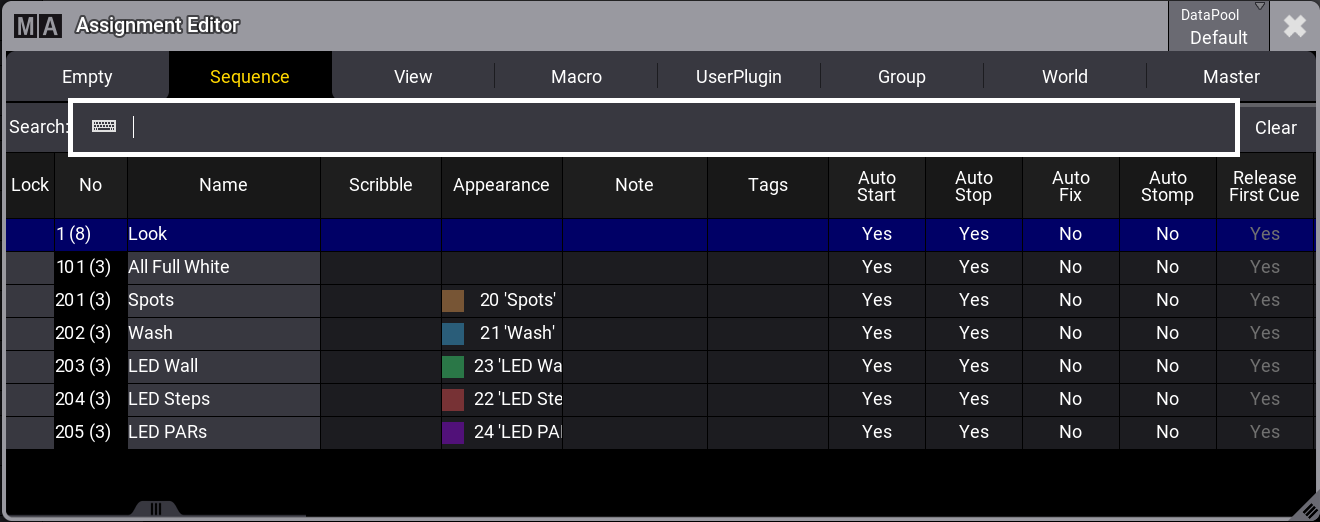
Assignment Editor - キーの機能を選択するには、Key を右クリックまたは長押ししてください。Select Key ポップアップが開きます。
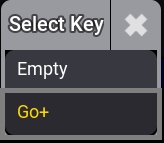
Select Key ポップアップ - DC Remote 信号をトリガーします。In と Out の値は100%になります。
|
|
ヒント |
| DCリモートやDMXリモートのしきい値はパーセントで定義されますが、MIDIリモートのしきい値は1〜127のMIDI ベロシティで定義されます。 |
|
|
ヒント |
| さまざまな Readout オプションは、Trigger On/Off、In From/To、Out From/To 値に影響します。 |
例2
|
|
制限 |
| grandMA3 command wing などの grandMA3 onPC 製品は、スイッチのオン/オフはできますが、フェードアウトはしません。詳しくは DCリモート入力の接続 を参照してください。 |
Faderリモートを追加するには、以下のようにします。
- 上述のステップ1〜6に従います。
- Target を選択します(例: Master)。
- Fader を Master に設定します。
- リモートでフェーダを動かすと、それに応じて In と Out 値が変わります。

例3
場合によっては、入出力値のスケーリングが必要になります。入出力値の範囲は変更できます。
In From を20%に設定するには、以下のようにします。
- In From を右クリックまたは長押しします。電卓が開きます。
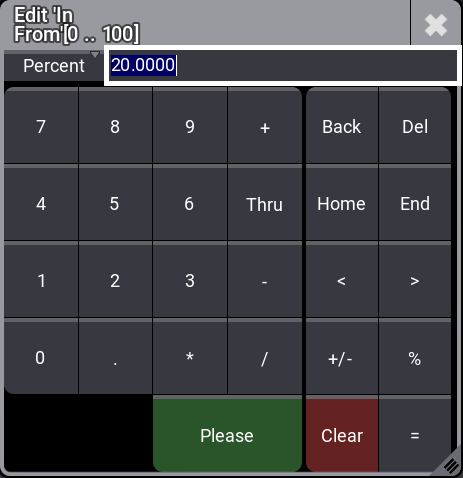
- Dec8 を長押しすると、ドロップダウンが開きます。
- Percent をタップすると、表記が変わります。
- 2 0 と押して Please を押します。In From 値が入力されます。
- リモートのフェーダを動かすと、それに応じて In/Out 値が変わります。

| ヒント | |
| 詳細については、Remote キーワード を参照してください。 |