MVR-xchange
| grandMA3 ユーザマニュアル » リモート入出力 » MVR-xchange | Version 2.2 |
MVR メニューは、USBドライブを用いる代わりに、ネットワーク接続を介して、MVRファイルを交換・管理するためのプラットフォームを提供します。MVRファイルについては、My Virtual Rig (MVR) 参照してください。
MVR-xchange は DIN SPEC 15801:2023-12 で規定されています。詳しくは www.beuth.de/en/technical-rule/din-spec-15801/373968511 を参照してください。
MVR メニューの背後にある考え方は、MVRファイルをステーションから指定ネットワークに送信し、それを他のステーションと共有することです。詳しくは SendMVR キーワード を参照してください。
MVR メニューは、以下のようにして開きます。
- Menu を押してメニューを開きます。
- In & Out をタップします。
- MVR をタップすると MVR メニューが開きます。
メニューの上部には、以下の3つの要素があります。
- Group: 標準のグループ名は Default です。グループ名は編集できます。同じグループ名のステーションは、同じ交換グループを共有します。
- Interface: ネットワーク・インターフェースを指定します。
|
|
ヒント |
| 異なるデバイス間でデータを共有するには、デバイスが同じネットワーク内にある必要があります。 |
|
|
ヒント |
| 異なるデバイス間でデータを共有するには、ネットワーク接続を確立する必要があります。詳しくは ネットワーキング - ネットワーク接続の有効/無効化 を参照してください。 |
- Enable: MVRファイルの交換を可能にするには、Enable を有効にしてください。ステーションとセッションの通信については、Station Control を参照してください。
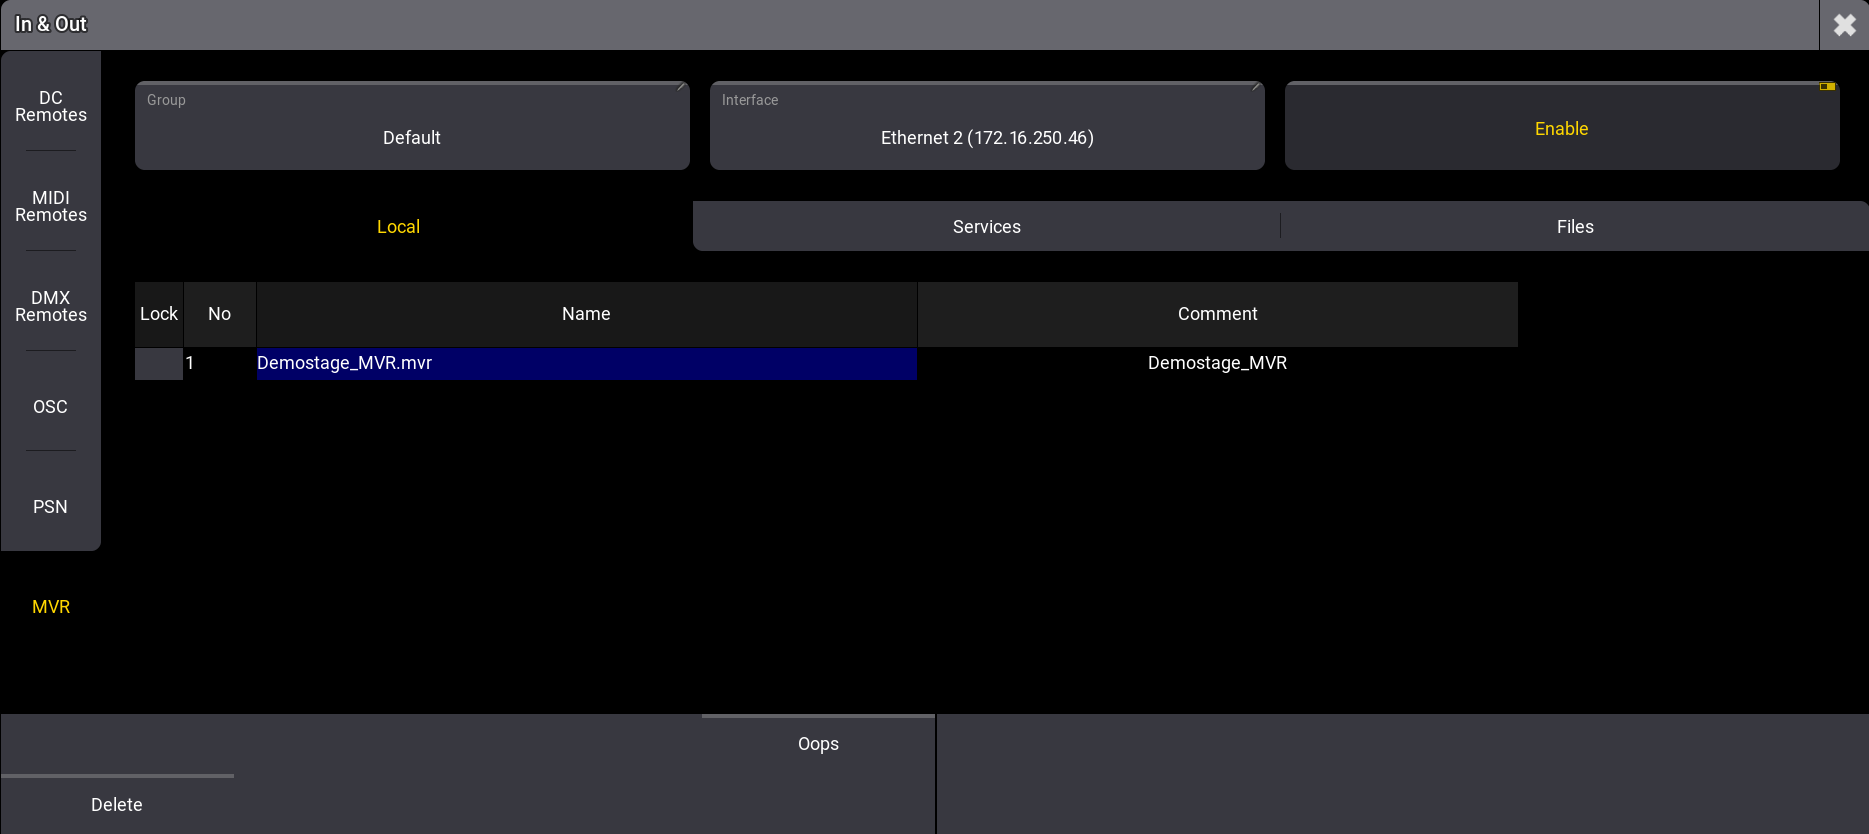
MVR のメイン領域は、Local、Services、および Files の3つのタブに分かれています。タブを選択すると、下のグリッドが変わります。選択しされているタブの文字色は黄色になります。
Local
- Local: Exchange グループにローカルでコミットされたすべてのMVRファイルを表示します。メニューからファイルの削除や取り消しもできます。
Services
- Services: 交換グループ内のすべてのステーションを一覧表示します。ステーションが交換グループに参加すると、Services に表示されます。
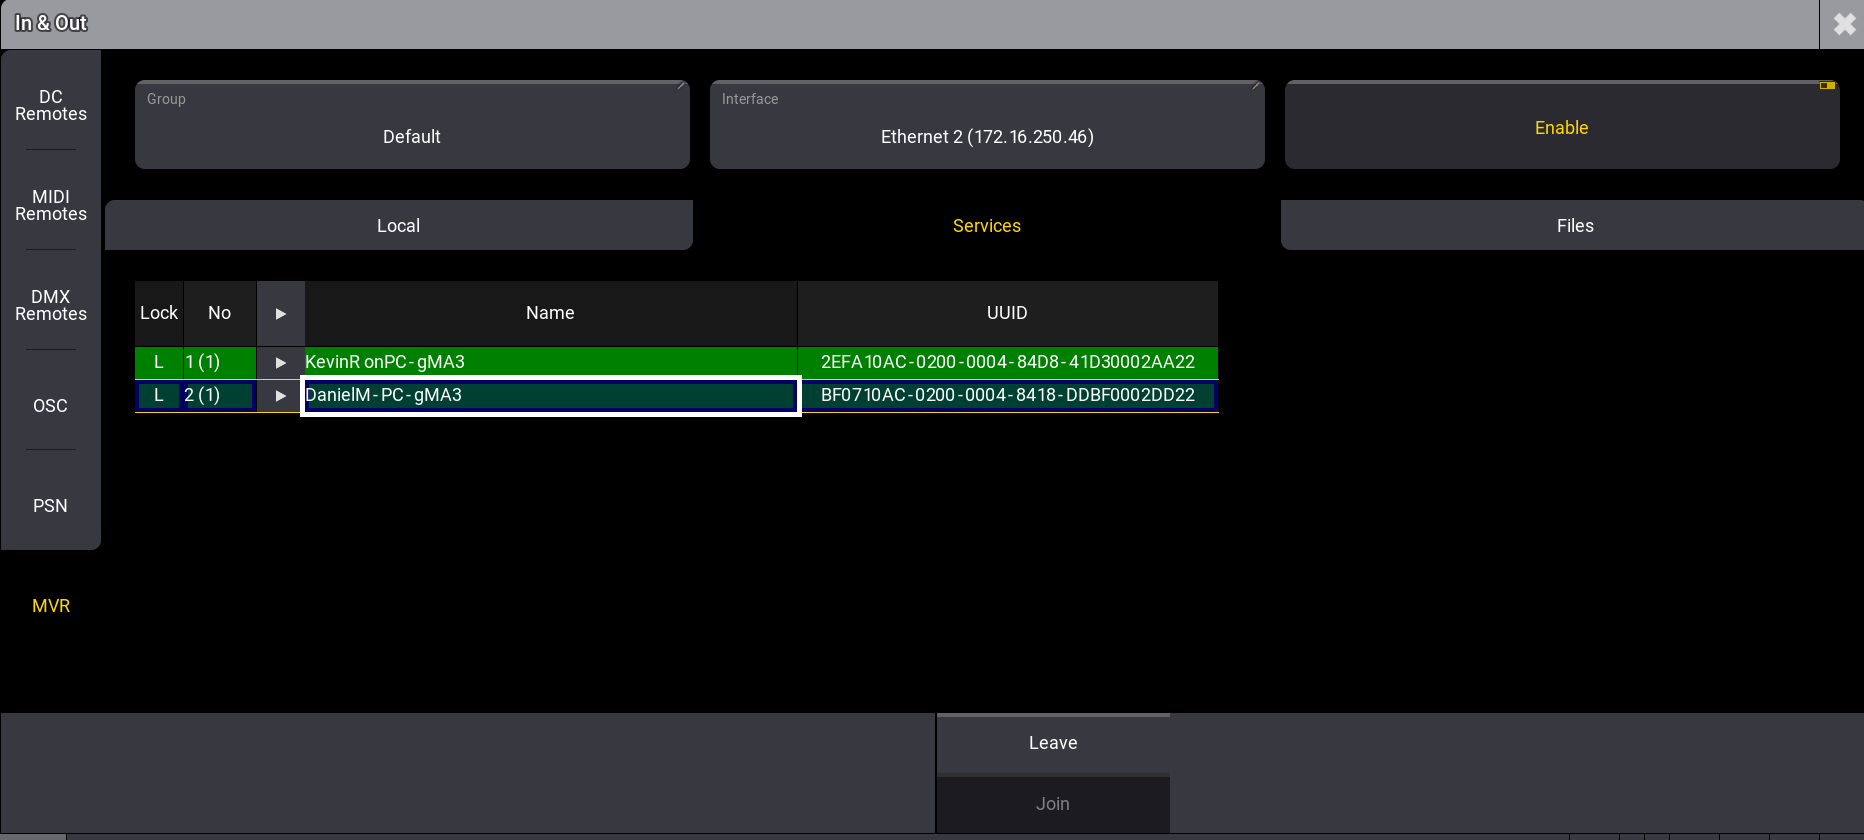
- 緑の背景: 既存の接続を表示します。接続を再確立するには、ステーションを選択して Join をタップします。
- 明緑: 接続している自身のステーションです。
- 赤の背景: 接続が中断されたことを示しています。接続を中断するには、ステーションを選択して Leave をタップします。
- UUID: Universally Unique Identifier
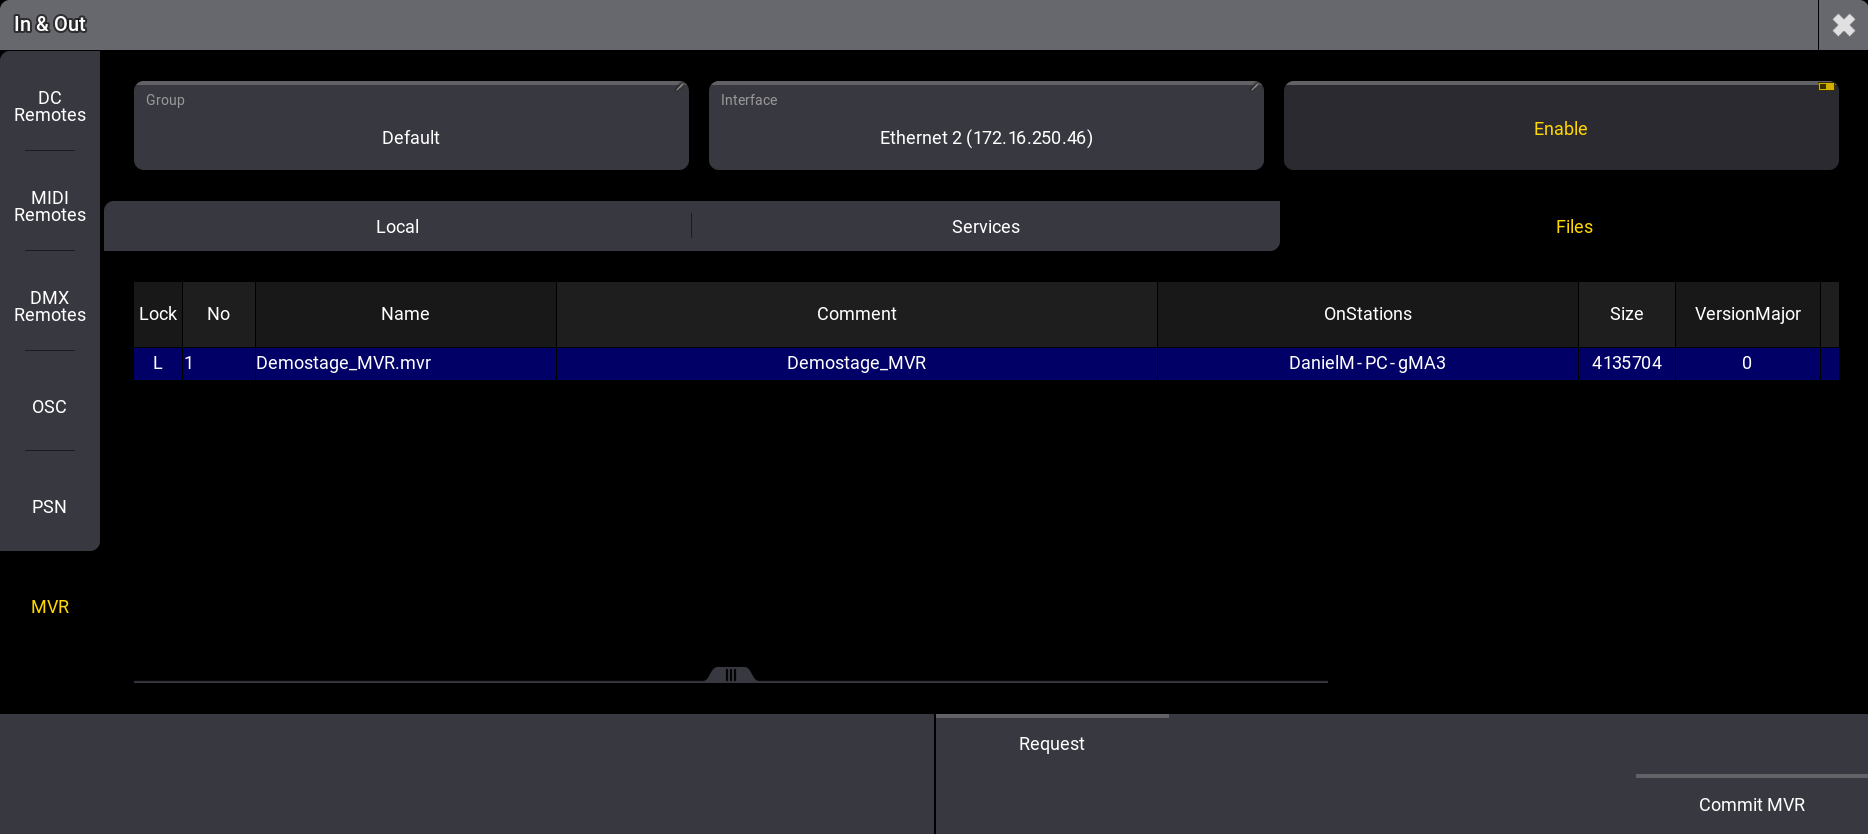
Files
- Files: 他のステーションから送られたMVRファイルをリクエストしたり、MVRファイルをコミットしたりできます。リクエストするには、ファイルを選択して Request を、コミットするには Commit MVR をタップします。
MVRファイルのコミット
MVRファイルをコミットするには、以下のようにします。
- Files をタップします。
- Commit MVR をタップすると、ポップアップが開きます。
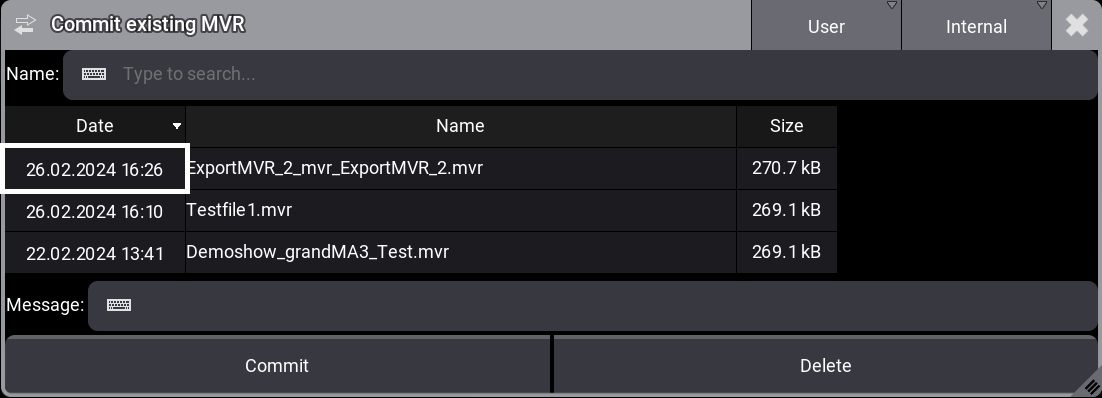
- MVRファイルを選択し、Commit をタップしてください。
|
|
ヒント |
| Message 欄にコメントを設定できます。このコメントは他のステーションにも表示されます。 |
MVRファイルのリクエスト
別のステーションにファイルをリクエストするには、以下のようにします。
- Files をタップします。
- 一覧でファイルをタップすると、それが選択されます。
- Request をタップします。ステータスバーにはリクエスト状態が表示されます。
- 確認のポップアップが開きます。
- Ok をタップしてください。ファイルがリクエストされます。
ファイルの保存場所については、フォルダ構造 を参照してください。