DMXモードおよびDMXチャンネルの挿入
|
grandMA3 ユーザマニュアル » フィクスチャタイプ » フィクスチャタイプの構築 » DMXモードおよびDMXチャンネルの挿入
|
Version 2.2 |
次のステップでは、DMXモードとDMXチャンネルを挿入し、それらをジオメトリにリンクすることです。
特定の機能やアトリビュートは、フィクスチャの特定の物理的な部分によってのみ実行されます。例えば、パン動作は、基本ムービングヘッドのヨークによって行われます。
したがって、特定の機能やアトリビュートを持つDMXチャンネルを、フィクスチャタイプの対応する幾何学的部分にリンクする必要があります。
必要条件:
DMXモードについて:
- DMXモードは、1つまたは複数のDMXチャンネルで構成されます。
- DMXチャンネルは、フィクスチャのさまざまなアトリビュートと機能を定義します。
- DMXモードは親で、DMXチャンネルがその子になります。
|
|
重要 |
| フィクスチャタイプの構造は、親-子の階層関係に基づいています。まず親があり、その下に子が続きます。子は複数ある場合があります。 |
|
|
ヒント |
| 多くのメーカが、チャンネルを定義するDMXチャートを提供しています。ほとんどの場合、メーカのWebサイトから特定のフィクスチャタイプのDMXチャートをダウンロードできます。このDMXチャートを利用して、フィクスチャタイプのテーブルにチャンネルを入力します。 |
準備
この基本的なムービングヘッドは、以下のような相対パッチアドレスと関連機能を持つDMXチャートに基づいています。
| 相対パッチアドレス | 機能 |
|---|---|
| 1 |
Pan (8ビット) 540°のパン動作 |
| 2 | Pan Fine (16ビット) |
| 3 |
Tilt (8ビット) 270°のチルト動作 |
| 4 | Tilt Fine (16ビット) |
| 5 | Dimmer |
| 6 | Red |
| 7 | Green |
| 8 | Blue |
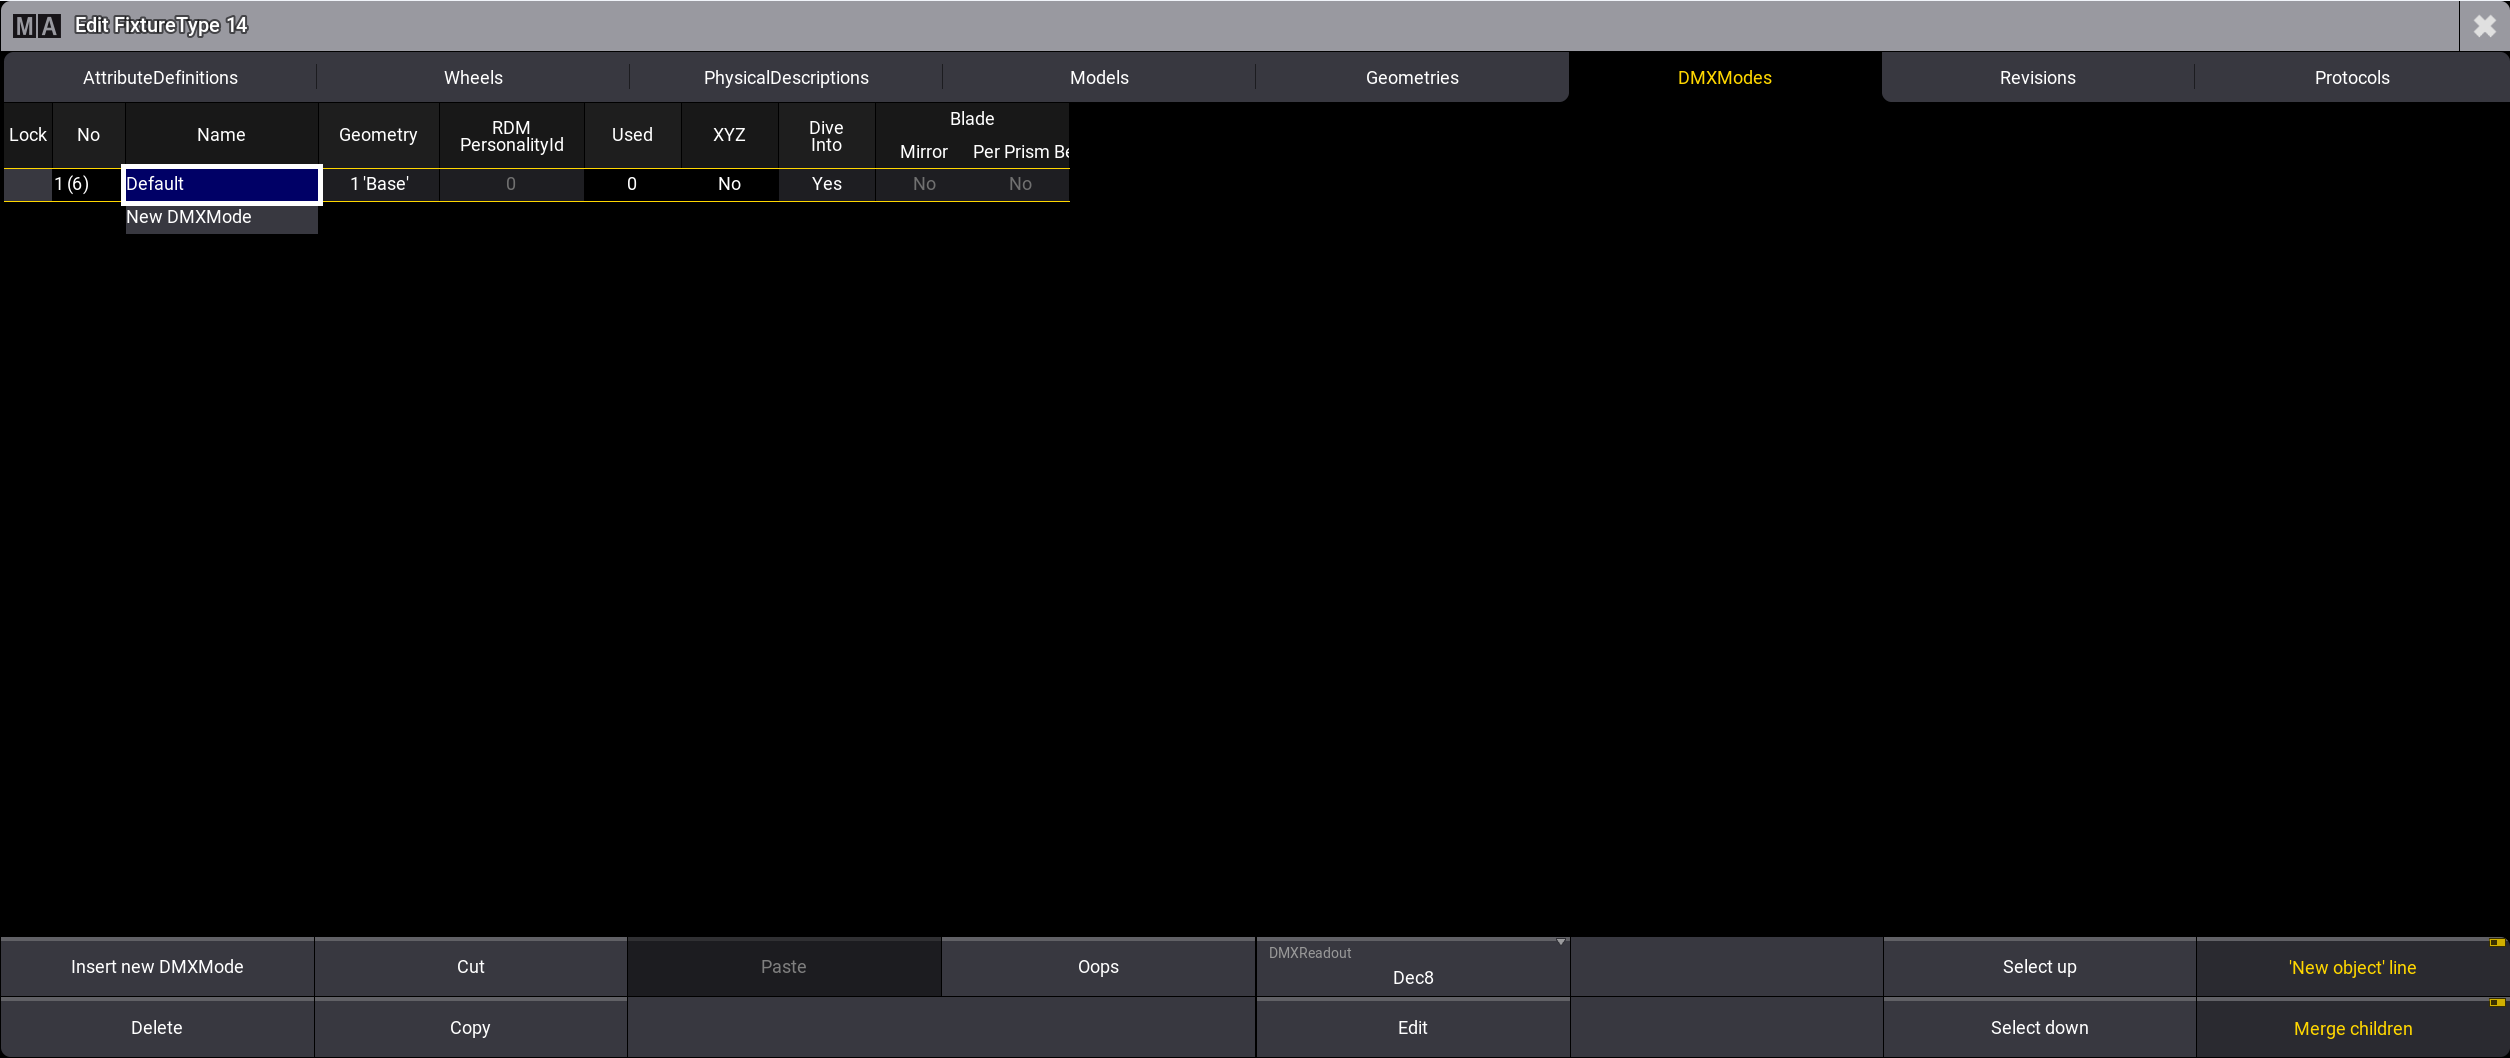
- DMXModes タブをタップします。
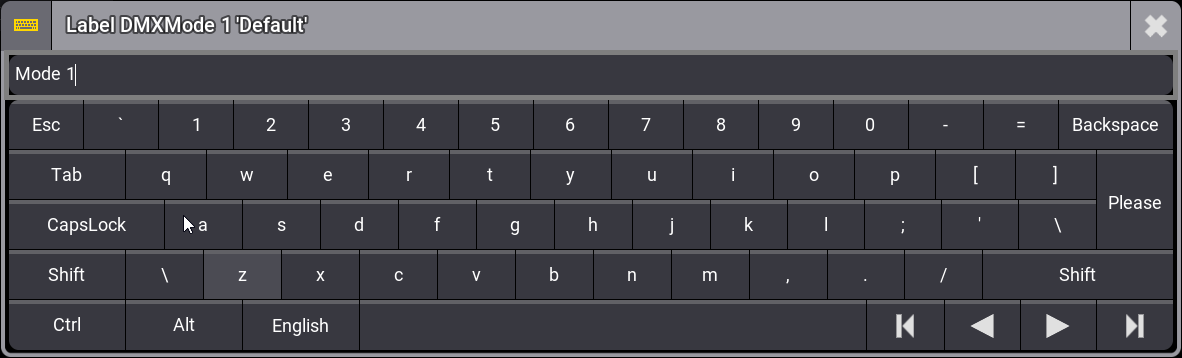
- セルの名前を変更するには、Default と表示されたセルを長押しするか右クリックします。テキストエディタが開きます。
- 下の画面例のように、Default を Mode 1 という名前に変更します。
- DMXチャンネルを挿入するには、Mode 1 を選択し、もう一度 Edit タブを選択します。ツリー構造の DMX Channel Editor が開きます。

このエディタで最も重要な列は以下の通りです。
- Coarse、Fine、Ultra、Default、Highlight:
Parameter List を参照してください。 - Attribute:
DMXチャンネルの機能を表示します。 - Master:
チャンネル値がグループ・マスターやグランドマスターから影響を受けるかどうかを指定します。 - Physical From:
フィクスチャの物理値です。Live Patch では変更できません。 - Physical To:
フィクスチャの物理値です。Live Patch では変更できません。 - DMX From:
チャンネル機能に対するDMX値範囲の下限を設定します。Live Patch では変更できません。 - DMX To:
この値は、後続チャンネル機能の DMX From 値またはDMXチャンネルの終端に応じて自動的に計算されます。
基本的なムービングヘッドの例では、すべての異なるアトリビュート(Pan、Tilt、Dimmer、Red、Green、Blue)に対して6つのDMXチャンネルが必要です。
DMXチャンネル1 - Pan の入力
|
|
ヒント |
| 以下の例では、50%と100%の値しかないため、DMXReadout を Dec8 から Percent に変更するのが適切です。 より正確なので、他のケースでは Dec8 や Dec16 を使う方が理にかなっています。 |
以下のようにして最初のチャンネルを入力します。
- DMXChannel 1 の行で以下のように入力します。
・Coarse: 1
・Fine: 2
・Default: 50 %
・Highlight: none - Geometry 列を編集します。
DMXChannel 1 の行を長押しするか、Edit を押してセルをタップします。
Edit Geometry ポップアップが開きます。
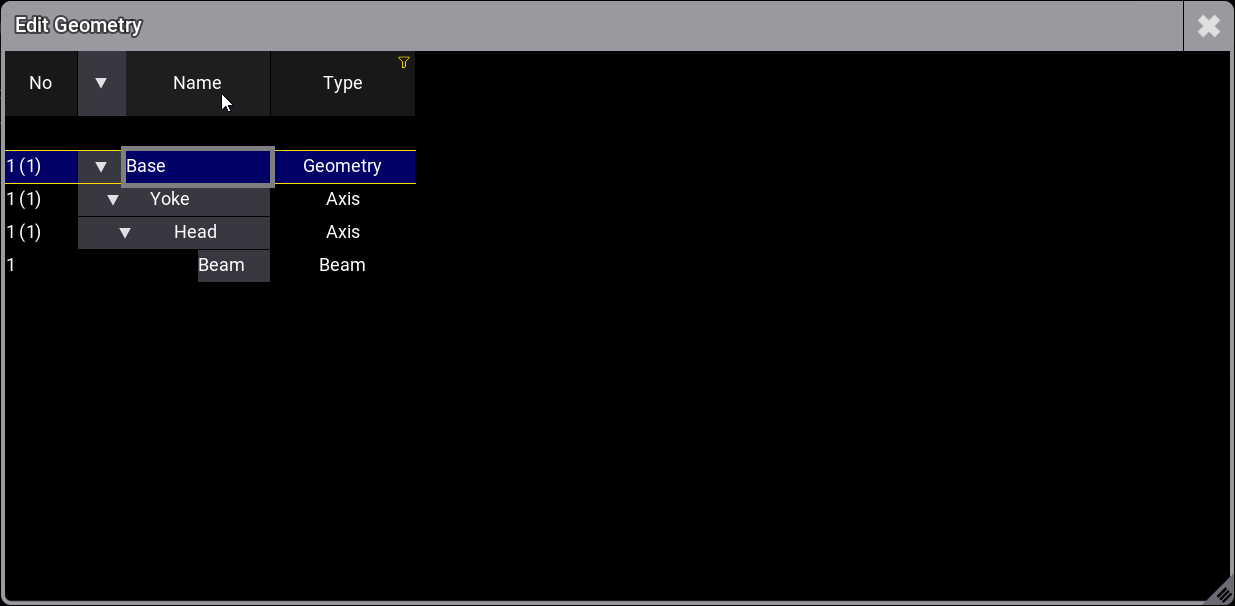
Edit Geometry ポップアップ - Merge children ボタンが無効になっていることを確認してください。
- DMXChannel 1 を展開して LogicalChannel エントリーを表示します。
・DMXChannel 1 の行で をタップします。
 - LogicalChannel の行で以下を選択します。
・Attribute: Pan - DMXChannel 1 が Yoke_Pan という名前に変わります。
・Master: none - ChannelFunction でのさらなるエントリーのために、LogicalChannel(Pan に変化)を展開します。
・LogicalChannel の行で をタップします。 - ChannelFunction の行で以下のように選択します。
・Attribute: Pan
・Physical From: -270
・Physical To: 270
|
|
ヒント |
| アトリビュートを選択すると、DMXチャンネルは、そのアトリビュートにちなんだ名前(Geometry_Attribute)に変わります。 |
これで、DMXチャンネル1が入力されました。
DMXチャンネル2 - Tilt の入力
以下のようにして2番目のチャンネルを入力します。
- Yoke_Pan をタップします。
- 'New object' line ボタンをタップして NewDMXChannel を有効にします。
- New DMXChannel をタップして Insert new DMXChannel をタップします。
New DMXChannel が DMXChannel 2 という名前に変わります。 - 2番目のチャンネルとして DMXChannel 2 の行で以下のように入力します。
・Coarse: 3
・Fine: 4
・Default: 50 %
・Highlight: none - Geometry 列を編集し、Head を選択します。
- LogicalChannel を開きます。詳しくは、最初のDMXチャンネルの説明にある ステップ4 を参照してください。
- ・Attribute: Tilt
- DMXChannel 2 が、アトリビュートにちなんだ名前に変わります。
・Master: none - ChannelFunction を開きます。詳しくは、最初のDMXチャンネルの説明にある ステップ7 を参照してください。
・Attribute: Tilt
・Physical From: -135
・Physical To: 135
これで、DMXチャンネル2が入力されました。
DMXチャンネル3 - Dimmer の入力
以下のようにして3番目のチャンネルを入力します。
- New DMXChannel をタップし、Insert new DMXChannel をタップします。
New DMXChannel が DMXChannel 3 という名前に変わります。 - 3番目のチャンネルとして DMXChannel 3 の行で以下のように入力します。
・Coarse: 5
・Default: 0 %
・Highlight: 100 % - Geometry 列を編集し、Beam を選択します。
- LogicalChannel を開きます。詳しくは、最初のDMXチャンネルの説明にある ステップ4 を参照してください。
- ・Attribute: Dimmer
- DMXChannel 3 が、アトリビュートにちなんだ名前に変わります。
- アトリビュート値をグランドマスターで制御するには、Master 列をタップします。
・Select Master ポップアップが開きます。
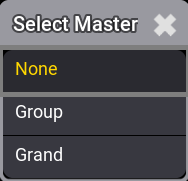
Select Master ポップアップ - ChannelFunction を開きます。詳しくは、最初のDMXチャンネルの説明にある ステップ7 を参照してください。
・Attribute: Dimmer
・Physical From: 0
・Physical To: 1
これで、DMXチャンネル3が入力されました。
DMXチャンネル4 - Red の入力
- New DMXChannel をタップし、Insert new DMXChannel をタップします。
New DMXChannel が DMXChannel 4 という名前に変わります。 - 4番目のチャンネルとして DMXChannel 4 の行で以下のように入力します。
・Coarse: 6
・Default: 100 %
・Highlight: 100 % - Geometry 列を編集し、Beam を選択します。
- LogicalChannel を開きます。詳しくは LogicalChannel タイプの ステップ4 を参照してください。
- ・Attribute: ColorRGB_R
- DMXChannel 4 が、アトリビュートにちなんだ名前に変わります。
- Master: none
- ChannelFunction を開きます。詳しくは ChannelFunction タイプの ステップ7 を参照してください。
・Attribute: ColorRGB_R
・Physical From: 0
・Physical To: 1
これで、DMXチャンネル4が入力されました。
DMXチャンネル5 - Green の入力
- New DMXChannel をタップし、Insert new DMXChannel をタップします。
New DMXChannel が DMXChannel 5 という名前に変わります。 - 5番目のチャンネルとして DMXChannel 5 の行で以下のように入力します。
・Coarse: 7
・Default: 100 %
・Highlight: 100 % - Geometry 列を編集し、Beam を選択します。
- LogicalChannel を開きます。詳しくは LogicalChannel タイプの ステップ4 を参照してください。
- ・Attribute: ColorRGB_G
- DMXChannel 5 が、アトリビュートにちなんだ名前に変わります。
- Master: none
- ChannelFunction を開きます。詳しくは ChannelFunction タイプの ステップ7 を参照してください。
・Attribute: ColorRGB_G
・Physical From: 0
・Physical To: 1
これで、DMXチャンネル5が入力されました。
DMXチャンネル6 - Blue の入力
- DMXChannel 2 で述べた ステップ1〜3 のように始めます。
- 6番目のチャンネルとして DMXChannel 6 の行で以下のように入力します。
- ・Coarse: 8
・Default: 100 %
・Highlight: 100 % - Geometry 列を編集し、Beam を選択します。
- LogicalChannel を開きます。詳しくは LogicalChannel タイプの ステップ4 を参照してください。
- ・Attribute: ColorRGB_B
- DMXChannel 6 が、アトリビュートにちなんだ名前に変わります。
- Master: none
- ChannelFunction を開きます。詳しくは ChannelFunction タイプの ステップ7 を参照してください。
・Attribute: ColorRGB_B
・Physical From: 0
・Physical To: 1
これで、DMXチャンネル6が入力され、DMXモード1挿入されます。DMXMode Editor は以下のようになります。
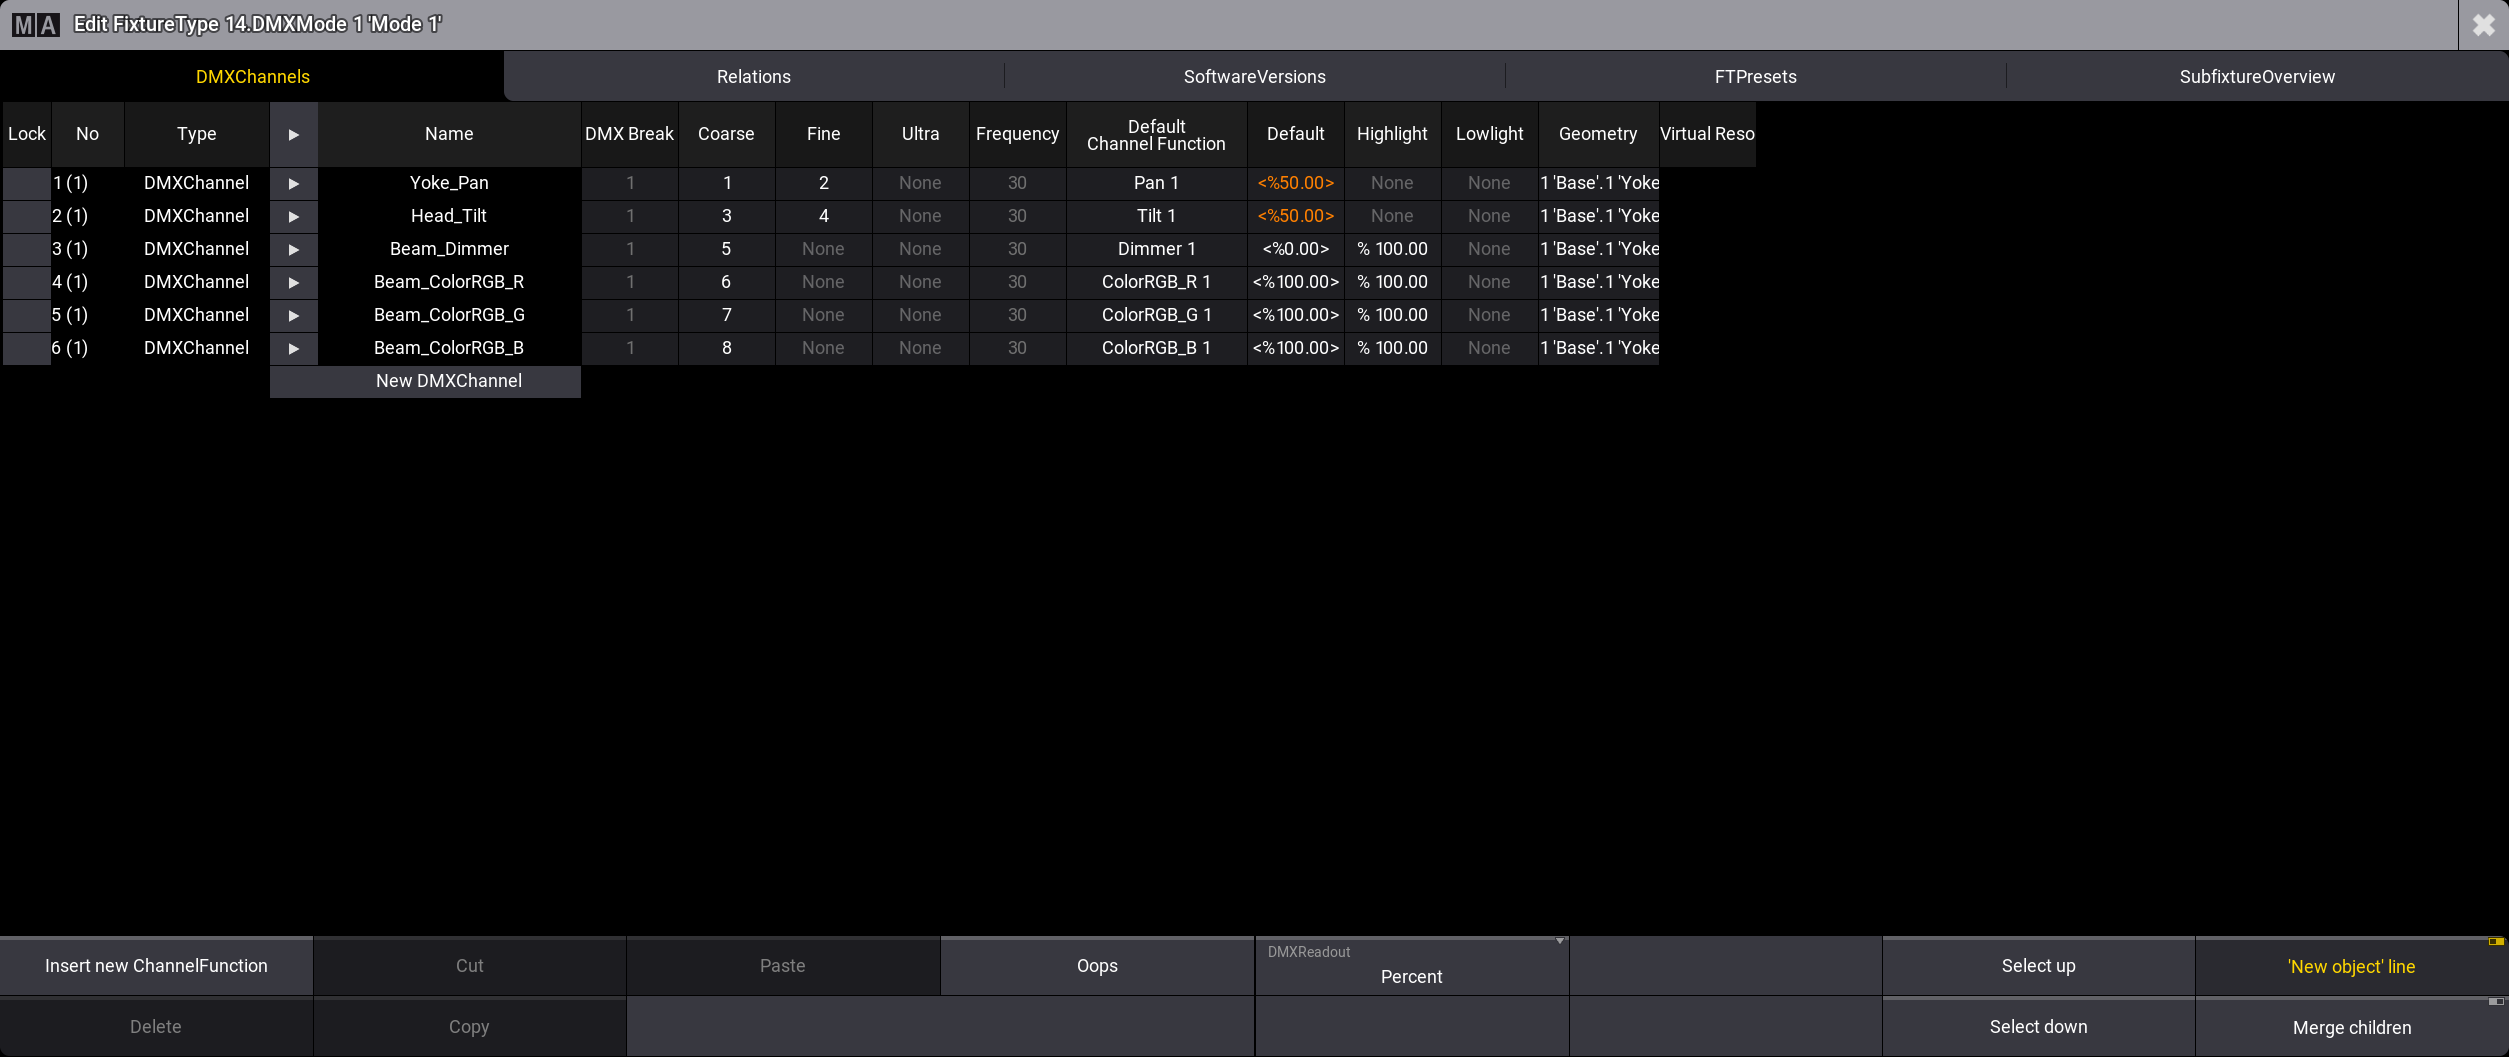
現在、これら6つのチャンネルは、基本的なムービングヘッドの全アトリビュートをカバーしています。
すべてのアトリビュート(Pan、Tilt、Dimmer、ColorRGB)とジオメトリ(Base、Yoke、Head、Beam)を備えた基本的なムービングヘッドを構築する例が完了しました。
|
|
ヒント |
| 右側の SubfixtureOverview タブでは、各サブフィクスチャのすべてのアトリビュートをプレビューできます。これによって、フィクスチャタイプのすべてのアトリビュートがカバーされているかどうかを確認できます。 |
|
|
ヒント |
| フィクスチャタイプが正しく表示され、動作しているかどうかを確認してください。 そのためには、Fixture Sheet と 3D Viewer を開き、実装されているすべての機能を試してください。 |