レイアウトの作成
| grandMA3 ユーザマニュアル » レイアウト » レイアウトの作成 | Version 2.2 |
レイアウトは Layout プールで作成され、Layout ウィンドウやエディタで編集できます。
Layout プールと Layout ウィンドウを1つの画面に配置すると、レイアウトを素早く操作でき、すべてのレイアウトを一目で把握できます。
レイアウトにフィクスチャを追加するには、以下のようにします。
- Add Window ダイアログを開いて Data Pools タブで Layouts を選ぶと、Layouts プール・ウィンドウが開きます。
- レイアウトに割り当てたいフィクスチャを選択します。
|
|
ヒント |
| 選択したフィクスチャの Selection Grid 位置が、レイアウトに割り当てられます。詳しくは Selection Grid を参照してください。 |
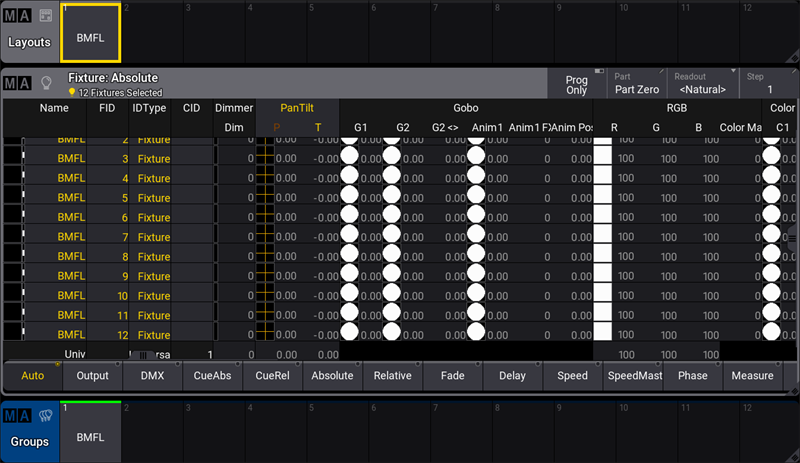
Fixture Sheet、Layouts および Groups プール
- 選択したフィクスチャをレイアウトに追加するには、Assign を押して Layout プールのセルをタップするか、フィクスチャを割り当てたい Layout ウィンドウの場所をタップしてください。そのフィクスチャがレイアウトに追加されます。
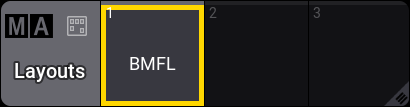
Layout プール・ウィンドウ
|
|
ヒント |
| さらに、サブフィクスチャを選択してレイアウトに割り当てます。 |
プール要素
Layout ウィンドウにプール要素を追加するには、例えば Assign Group 3 と押してから、このグループを割り当てたい Layout ウィンドウの領域をタップします。プール要素が Layout ウィンドウに追加されます。
さまざまなレイアウト要素に対するデフォルトの設定については、レイアウトの編集 - Layout Element Defaults を参照してください。
|
|
ヒント |
| Layout プールと Layout ウィンドウを1つの画面に配置すると、レイアウトを素早く操作でき、すべてのレイアウトを一目で把握できます。 |
Layout View および Layout プール
Layout View ツールバー
タイトルバーの Setup をタップして、Layout View 左側のツールバーを有効にします。
|
|
ヒント |
| Setup を有効にすると、レイアウト・エンコーダバーも有効になります。詳しくは レイアウト・エンコーダバー を参照してください。 |
要素の選択
- 要素を選択するには、
 をタップします。
 - 選択したい要素をタップするか、投げ縄コマンドによって複数の要素を選択してください。
- 要素が選択されます。
要素の追加
レイアウト要素の左上隅が挿入位置になります。
- Layout ウィンドウで要素を追加するには、
 をタップします。
 - Layout ウィンドウの空いている場所をタップします。
- 要素が追加されます。
- 要素へのオブジェクト追加については、Layout View の編集 を参照してください。
要素の削除
- Layout ウィンドウで要素を削除するには、
 をタップします。
 - 削除したい要素をタップしてください。
- その要素が削除されます。
要素の移動
- Layout ウィンドウ内で要素を移動するには、
 をタップします。
 - 要素をタップしたまま、移動させたい場所までドラッグしてください。
その要素が移動します。
要素のサイズ変更
- 要素のサイズを変更するには、
 をタップします。
 - サイズを変更したい要素を選択します。
- タップしたままドラッグしてサイズを変更してください。
その要素のサイズが変わります。
固定比率による要素のサイズ変更
- 実際のサイズ比を維持したまま要素のサイズを変更するには、
 をタップします。
 - サイズを変更したい要素を選択します。
- タップしたままドラッグしてサイズを変更してください。
その要素のサイズが固定比率で変わります。
Auto ツール
- Auto ツールを使用するには、
 をタップします。
 - 選択したい要素をタップするか、複数の要素を投げ縄選択します。選択した項目の周囲には、黄色の枠が表示されます。
レイアウト要素のタップ位置に応じて、以下の機能を利用できます。
- レイアウト要素を移動するには、要素内をタップしたままドラッグします。
- レイアウト要素外側の上下左右いずれかをタップしたままドラッグすると、その方向にサイズ変更できます。
- レイアウト要素外側のいずれかの角部分をタップしたままドラッグすると、縦横比を考慮せずにサイズ変更できます。MA を押していると、縦横比を保ったままサイズ変更できます。
Layout View の Fit オプション
タイトルバーの Fit Type をタップして、実行したいオプションを選びます。
- すべてのレイアウト要素をウィンドウに合わせて表示するには Elements を選びます。
- キャンバス全体をウィンドウに合わせるには Canvas を選びます。キャンバスから大きく離れた位置に割り当てられている要素は表示されません。
- キャンバスとすべての要素の両方を合わせるには Both を選びます。
 をタップすると、選択した Fit Type に応じて "Zoom to Fit" が実行されます。
|
|
ヒント |
| キャンバスの Fit モードは変更できます。詳しくは Layout View Settings を参照してください。 |
- Layout キーワードを用いて、コマンドラインからレイアウトを作成できます。詳しくは、Layout キーワード および Assign キーワード を参照してください。
|
|
User name[Fixture]>Assign Layout 1 |
レイアウトのクローン化
クローン構文を利用して、フィクスチャをレイアウトにクローン化できます。クローン化については、Clone キーワード および クローン を参照してください。
必要条件:
- フィクスチャをパッチ。詳しくは パッチとフィクスチャ設定 を参照してください。
- Layout Viewer ウィンドウ、Fixture Sheet および Layout プールを表示。
フィクスチャをレイアウトにクローン化するには、以下のようにします。
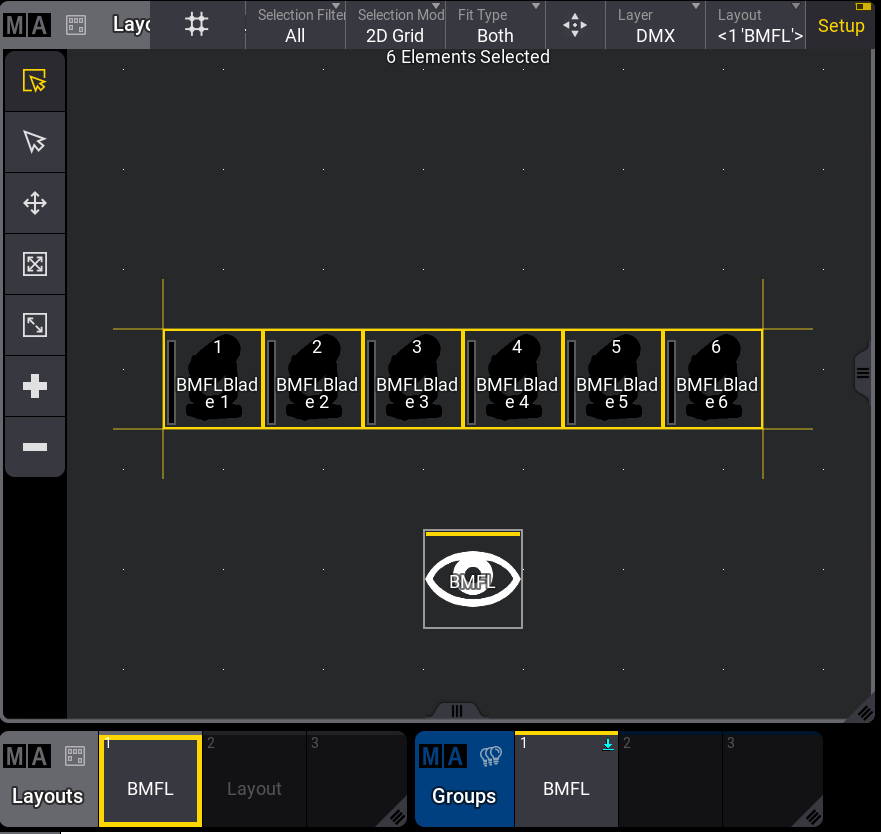
- Layout プール・ウィンドウで BMFL をタップします。以下のように、BMFL レイアウトが Layout Viewer ウィンドウに表示されます。
Layout Viewer - クローン
- 新しいフィクスチャを最初の Layout プールにクローン化するには、コマンドラインに以下のように入力します。
|
|
User name[Fixture]>Clone Fixture 1 Thru 6 At Fixture 7 Thru 12 If Layout 1 |
- Clone ポップアップが表示されます。ここには、Low Priority、High Priority、Overwrite、および Cancel という選択肢があります。Please を押してください。詳しくは Clone キーワード を参照してください。
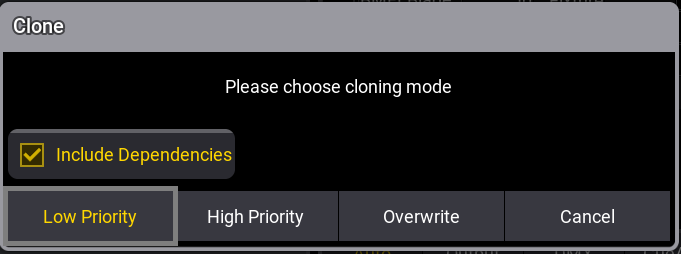
Clone ポップアップ
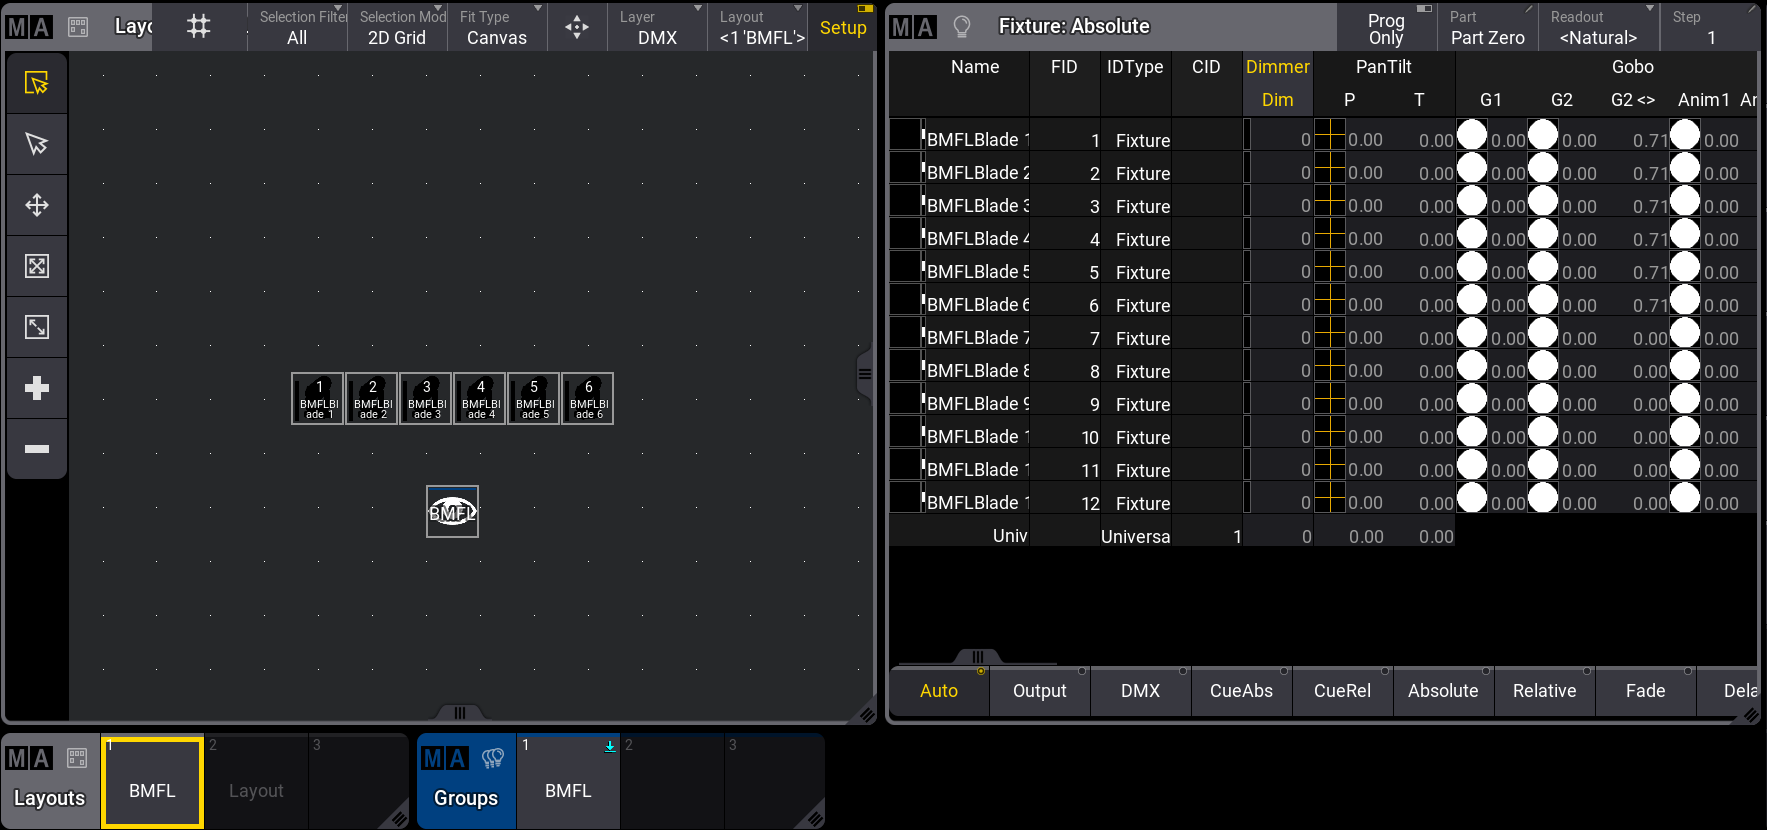
- 新しいレイアウト要素は、既存のレイアウト要素から少しずらして配置されます。レイアウト要素のすべての設定もクローン化されます。
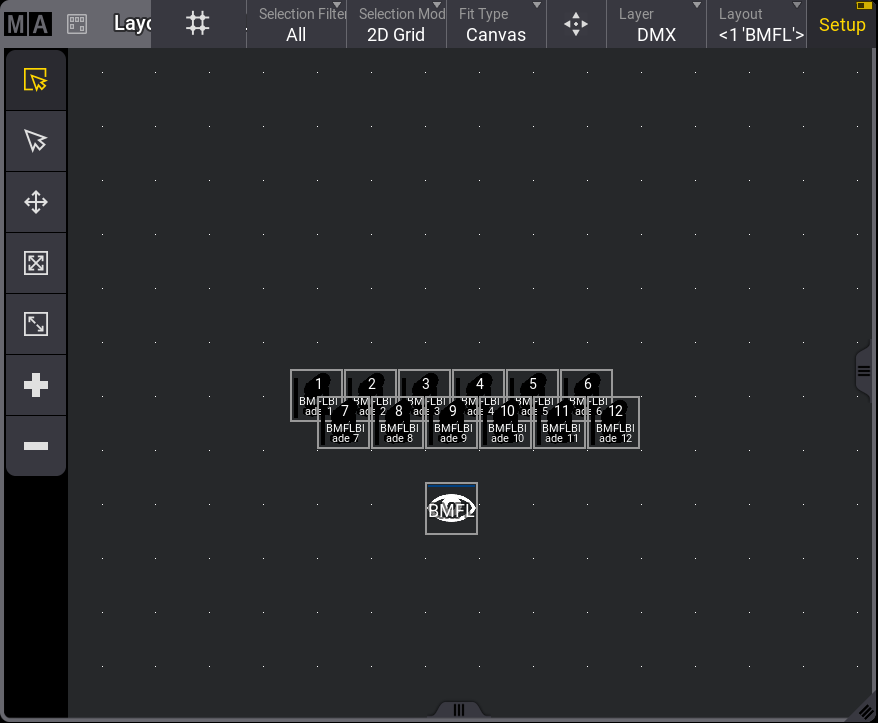
Layout Viewer ウィンドウ - 少しずらしてフィクスチャが配置